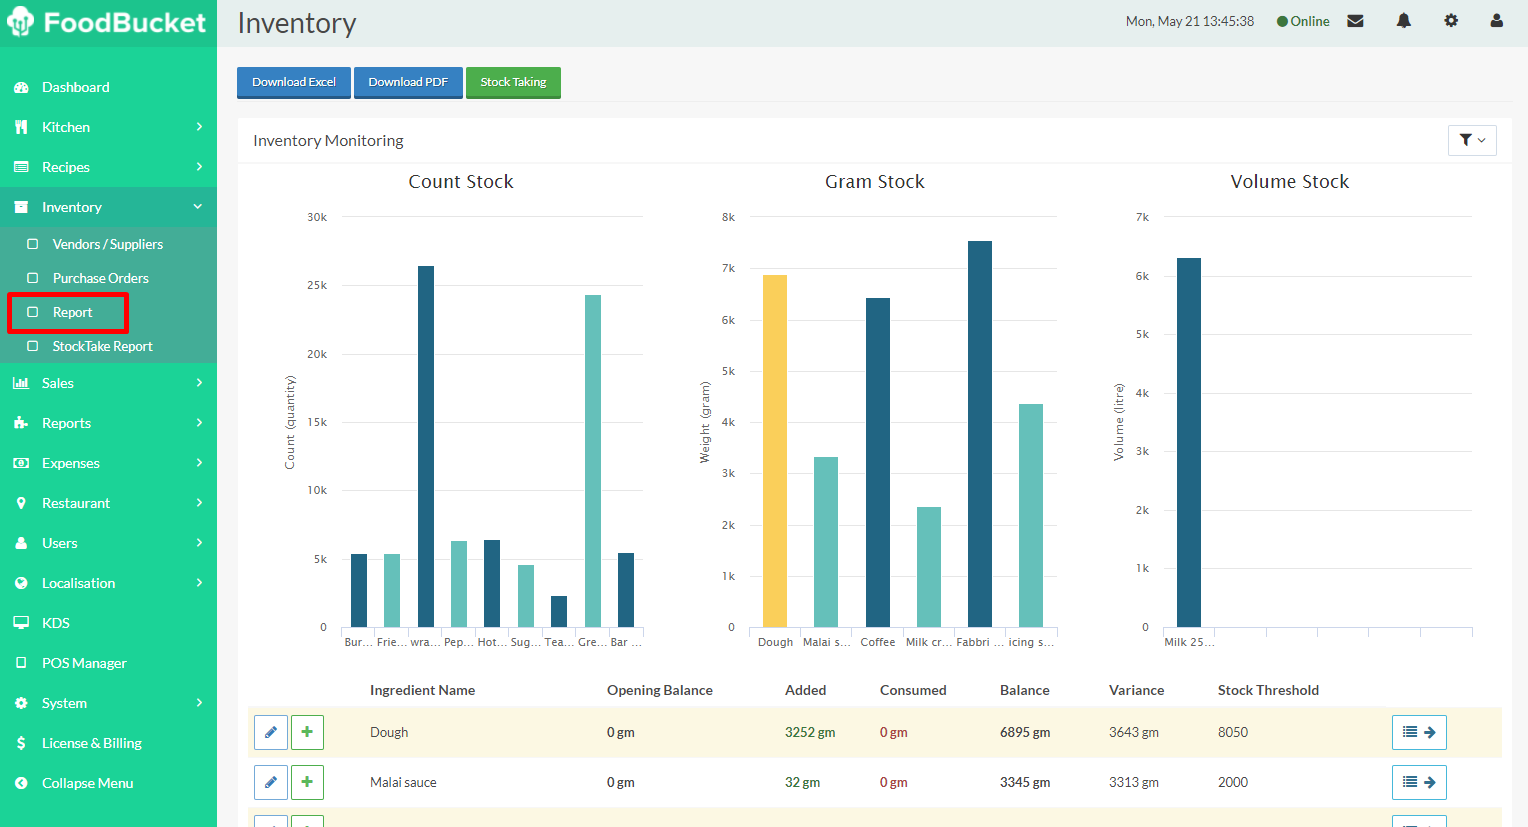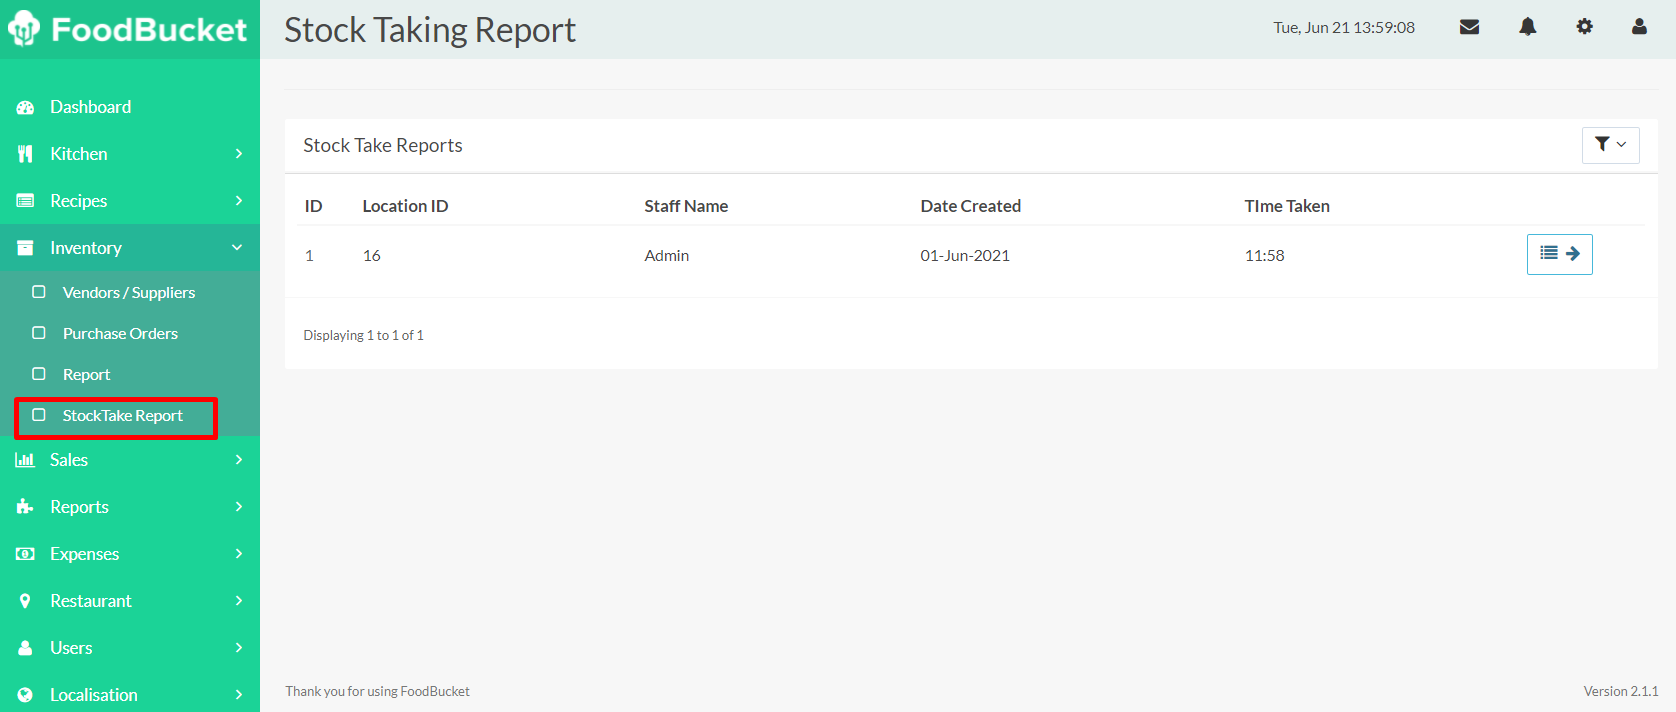

# Requirements

## Hardware Requirements For FoodBucket <a href="#id-0-toc-title" id="id-0-toc-title"></a>

Though we have kept our Software compatible at the highest just to make it easier for our clients to go live in production but still if you need to know the recommended hardware requirement, please see the list below:

Our POS is built for both Touch & Mouse. So feel free to go with however you like.

#### For Point of Sale / POS <a href="#id-1-toc-title" id="id-1-toc-title"></a>

<table><thead><tr><th></th><th width="168">iPad / iOS</th><th>Android</th><th>Windows</th></tr></thead><tbody><tr><td>OS Version</td><td>14.4+</td><td>9.0+</td><td>10</td></tr><tr><td>RAM</td><td>4G</td><td>4G</td><td>4G</td></tr><tr><td>HDD / Hard Drive</td><td>300M</td><td>300M</td><td>300M</td></tr><tr><td>Display Size</td><td>9.7"+</td><td>9.7"+</td><td>1080</td></tr><tr><td></td><td><img src="https://2174323930-files.gitbook.io/~/files/v0/b/gitbook-x-prod.appspot.com/o/spaces%2F-MkrAx-51uwuvDxM_Z3r%2Fuploads%2FekMYs9RkENoVva0CAEMj%2Fimage.png?alt=media&amp;token=b395bb34-3ad0-465c-b043-9fc01aeb315f" alt="" data-size="original"></td><td><img src="https://2174323930-files.gitbook.io/~/files/v0/b/gitbook-x-prod.appspot.com/o/spaces%2F-MkrAx-51uwuvDxM_Z3r%2Fuploads%2FHqihI8u0Mfq0F8sewyMU%2Fimage.png?alt=media&amp;token=6e9f5789-8a45-4421-8ea4-1ef879b30b9d" alt=""></td><td><img src="https://2174323930-files.gitbook.io/~/files/v0/b/gitbook-x-prod.appspot.com/o/spaces%2F-MkrAx-51uwuvDxM_Z3r%2Fuploads%2FJJrb0Sga0S7WywBURNXP%2Fimage.png?alt=media&amp;token=86f7755b-184f-4178-a03e-32ba73a29e02" alt="" data-size="original"></td></tr></tbody></table>

#### For Kitchen Display Systems <a href="#id-2-toc-title" id="id-2-toc-title"></a>

* 1920×1080 Resolution
* Branded LED with DVI or VGA Support
* KDS Client&#x20;

#### For On-Premise <a href="#id-3-toc-title" id="id-3-toc-title"></a>

* FoodBucket Appliance or Appliance Lite
* Internet Access
* UPS (Uninterrupted Power Supply)

#### For Waiter/Order Taking Tabs <a href="#id-5-toc-title" id="id-5-toc-title"></a>

* Same Requirement as POS
* Tabs with 7.9″ + can be used

## Receipt & Label Printers <a href="#id-6-toc-title" id="id-6-toc-title"></a>

We are constantly increasing the list of our Compatible Printers. At the moment we have tested the following Printers but if you want us to add more, please just write us an email.

#### Receipt Printers <a href="#id-7-toc-title" id="id-7-toc-title"></a>

* Epson TM88VI
* Epson T-90
* BlackCopper
* SpeedX

Other Printers are also compatible. Just try and let us know if there is any problem.

#### Label Printer <a href="#id-8-toc-title" id="id-8-toc-title"></a>

* Toshiba BEV4D – 50mmx40mm

#### Bluetooth Printer

* Black Copper BC-P58B
* Goojprt PT-210


# Cloud Setup

You can set up your **FoodBucket Cloud Kitchen** in a few simple steps.

**1.** First, go to [<mark style="color:blue;">**foodbucket.io**</mark>](https://foodbucket.io) and click on the [“**Create Account”**](https://foodbucket.io/register) button from the Main Menu.

<figure><img src="https://2174323930-files.gitbook.io/~/files/v0/b/gitbook-x-prod.appspot.com/o/spaces%2F-MkrAx-51uwuvDxM_Z3r%2Fuploads%2FMC4yxItWTzpl5OOMHxFZ%2Fimage.png?alt=media&amp;token=52ab4271-a8fe-4d56-b93e-021f1a4c7834" alt=""><figcaption></figcaption></figure>

&#x20;**2.** Fill up the form with your information and click on the[ **“Create Account”**](https://foodbucket.io/register) button to continue.

&#x20;

* **First Name:** Add your First Name e.g. John
* **Last Name:** Add Your Last Name e.g. Doe
* **Email:** Write your Complete valid email address.
* **Phone Number:** Write your complete Phone number with your country code.
* **Password:** Enter a strong password to secure your account.
* **Confirm Password:** Re-enter the password for confirmation.
* **Restaurant Name:** Add your Restaurant Name.
* **Restaurant Location:** Add the location of your restaurant.
* **Restaurant Country:** From the drop-down, select the name of the country where you are operating your restaurant.
* **Restaurant City:** Enter your Restaurant city name.
* **Restaurant URL**: Enter your unique URL for the restaurant e.g. newyorkpizza.foodbucket.io. Here new york pizza is your unique URL identifier.

<figure><img src="https://2174323930-files.gitbook.io/~/files/v0/b/gitbook-x-prod.appspot.com/o/spaces%2F-MkrAx-51uwuvDxM_Z3r%2Fuploads%2Fcnsv4XWNF3EdhSlThOum%2Fimage.png?alt=media&amp;token=631fb78c-baf9-4c4f-9192-fbba87db0051" alt=""><figcaption></figcaption></figure>

**3.** Now your account has been created and your kitchen is set up.

<figure><img src="https://2174323930-files.gitbook.io/~/files/v0/b/gitbook-x-prod.appspot.com/o/spaces%2F-MkrAx-51uwuvDxM_Z3r%2Fuploads%2FYKDkRstrr7WvrwLoMJpX%2Fimage.png?alt=media&amp;token=de91cd07-02ce-4f59-a3eb-38765793869e" alt=""><figcaption></figcaption></figure>

**4.** Here you go, your FoodBucket Cloud Kitchen is ready to use. Click on **“Continue to Login”**

<figure><img src="https://2174323930-files.gitbook.io/~/files/v0/b/gitbook-x-prod.appspot.com/o/spaces%2F-MkrAx-51uwuvDxM_Z3r%2Fuploads%2FvK2R8Xsc1tAXV3sZMvUv%2Fimage.png?alt=media&amp;token=e3eacca9-32a2-4219-8e05-154a85c3569c" alt=""><figcaption></figcaption></figure>

**5.** Welcome to your FoodBucket Cloud Kitchen Dashboard. Your Cloud Kitchen is **live now**. You can also download our app from the **iOS App Store** and **Google Play Store**. **The Microsoft Windows app** is available too.&#x20;

<figure><img src="https://2174323930-files.gitbook.io/~/files/v0/b/gitbook-x-prod.appspot.com/o/spaces%2F-MkrAx-51uwuvDxM_Z3r%2Fuploads%2FR7XSF2Vio7Agxm0KrHw7%2Fimage.png?alt=media&amp;token=e56bde9c-8d38-4e9f-9c29-54fbb3115a1a" alt=""><figcaption></figcaption></figure>

You can download **FoodBucket** **App** just by clicking the link below:

**1.** [<mark style="color:green;">**Android App**</mark>](https://play.google.com/store/apps/details?id=com.iu.foodbucket.unify\&hl=en-IN) \
**2.** [<mark style="color:green;">**iOS App**</mark>](https://apps.apple.com/pk/app/foodbucket-unify/id1553877375)\
**3.** [<mark style="color:green;">**Windows App**</mark>](https://apps.microsoft.com/store/detail/foodbucket-unify/9N7VGTRD93S3?hl=fr-dz\&gl=dz\&cid=msft_web_chart)


# On-Premise Setup

Our On-Premise setup may require some technical knowledge or IT Supervision but we will guide you through, step by step so that you can set it yourself.

Before we take a start, we want you to take a look at our appliance:

## Components <a href="#id-0-toc-title" id="id-0-toc-title"></a>

### **The Appliance**

<figure><img src="https://2174323930-files.gitbook.io/~/files/v0/b/gitbook-x-prod.appspot.com/o/spaces%2F-MkrAx-51uwuvDxM_Z3r%2Fuploads%2FNpPchn695mZvWC1uq7sa%2Fimage.png?alt=media&amp;token=c2440b5b-faa3-4d84-8849-8292ab94a078" alt="" width="375"><figcaption></figcaption></figure>

### **Front And Back – Diagram**

<figure><img src="https://2174323930-files.gitbook.io/~/files/v0/b/gitbook-x-prod.appspot.com/o/spaces%2F-MkrAx-51uwuvDxM_Z3r%2Fuploads%2FWEUwvRqjm6SZWDmw3byj%2Fimage.png?alt=media&amp;token=789ef007-0d77-4106-a911-34404519747c" alt="" width="555"><figcaption></figcaption></figure>

## Requirements <a href="#id-3-toc-title" id="id-3-toc-title"></a>

Things that you need to turn on the Appliance:

**MORE IMPORTANT: MAKE SURE YOU HAVE AN ACTIVE INTERNET CONNECTION.**

<table data-view="cards"><thead><tr><th>Item</th><th>Picture</th></tr></thead><tbody><tr><td>FoodBucket Appliance</td><td><img src="https://2174323930-files.gitbook.io/~/files/v0/b/gitbook-x-prod.appspot.com/o/spaces%2F-MkrAx-51uwuvDxM_Z3r%2Fuploads%2F4droOFLk7Dl5i8iZVP9m%2Fimage.png?alt=media&amp;token=161a0c6c-591d-4ee5-baa3-cc68fe8e105e" alt="" data-size="original"></td></tr><tr><td>Power Cable</td><td><img src="https://2174323930-files.gitbook.io/~/files/v0/b/gitbook-x-prod.appspot.com/o/spaces%2F-MkrAx-51uwuvDxM_Z3r%2Fuploads%2FCpyg4htzw7fkO76N2dpm%2Fimage.png?alt=media&amp;token=483efa34-cf8c-455c-beec-bf7f0a260487" alt=""></td></tr><tr><td>Ethernet Cables x 3</td><td><img src="https://2174323930-files.gitbook.io/~/files/v0/b/gitbook-x-prod.appspot.com/o/spaces%2F-MkrAx-51uwuvDxM_Z3r%2Fuploads%2FMOmkTQnVoLMetL4rQA0X%2Fimage.png?alt=media&amp;token=198a4b4a-96de-44f8-b4bb-0caed6b95cd3" alt=""></td></tr><tr><td>Network Router Switch</td><td><img src="https://2174323930-files.gitbook.io/~/files/v0/b/gitbook-x-prod.appspot.com/o/spaces%2F-MkrAx-51uwuvDxM_Z3r%2Fuploads%2FX9ULofpNEf0rJVEHemnd%2Fimage.png?alt=media&amp;token=b5b10c17-267a-4a66-afae-f2fdec50decf" alt="" data-size="original"></td></tr><tr><td>Access Point for Wireless and Wi-Fi</td><td><img src="https://2174323930-files.gitbook.io/~/files/v0/b/gitbook-x-prod.appspot.com/o/spaces%2F-MkrAx-51uwuvDxM_Z3r%2Fuploads%2FEF8DWee03dEmnIJNBegm%2Fimage.png?alt=media&amp;token=f0e9afb6-937d-45cf-aa93-671e989930ba" alt=""></td></tr><tr><td>POS Application / Laptop / Computer/ iPad /  Android</td><td><img src="https://2174323930-files.gitbook.io/~/files/v0/b/gitbook-x-prod.appspot.com/o/spaces%2F-MkrAx-51uwuvDxM_Z3r%2Fuploads%2FXHE4FY2DZPqvH9jsbDW0%2Fimage.png?alt=media&amp;token=636c588e-3af5-441c-afe2-c03c377e8974" alt=""></td></tr></tbody></table>

### **FoodBucket Appliance**

Foodbucket Appliance is enterprise-grade hardware that comes with a FoodBucket server, a built-in Router OS, An SNMP, and a Diagnostic system for our FoodBucket technician.

Our FoodBucket appliance is a masterpiece machine that just needs a push of a button to start and then anything that connects to it gels into our system and starts working.

### **Network Switch**

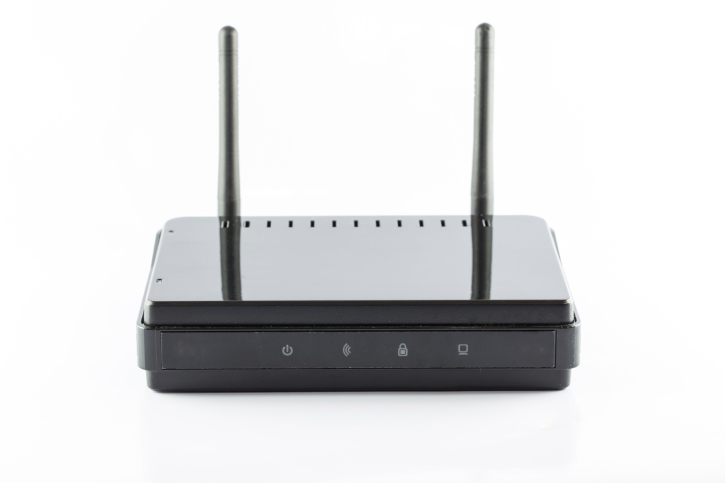
A network switch is required to connect more devices to Foodbucket Appliance in order to communicate with our system and also with each other for example Printers, KDS Clients, and Wifi Access Points. All can be connected to Foodbucket Appliance via Network Switch with an ethernet cable.

Make sure your Network Switch has a number of required ports. A typical system with 4 KDS Clients + 1 Wifi Access + 2 Printers router will require 8 Ports.

One to connect to FoodBucket Appliance and 7 for connecting to other devices using an ethernet cable.

#### Network Hub

A network hub can also be used to serve the purpose but they usually under-perform.

### **Access Point / Wi-Fi Router**

A Wi-Fi access point also called Wi-Fi Router is used to create Wi-Fi access to the FoodBucket appliances. This is used when you have a device that supports Wi-Fi e.g. iPad, Android Tablet, etc. They are connected to an Access Point which is connected to the FoodBucket appliance.

### **Desktop / iPad / Tablet**

This is required to verify checks and see if our appliance is working perfectly and then we connect it to our POS application.

## Installation <a href="#id-8-toc-title" id="id-8-toc-title"></a>

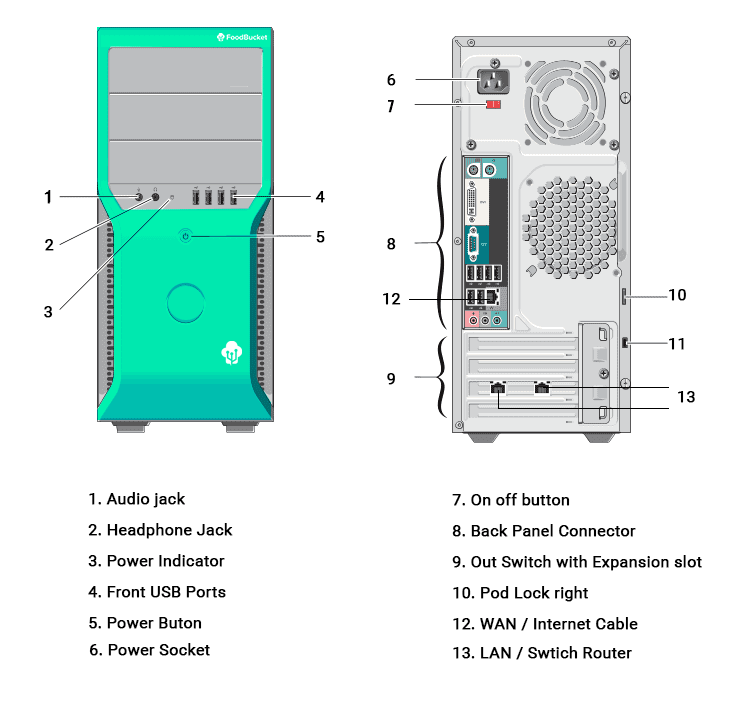
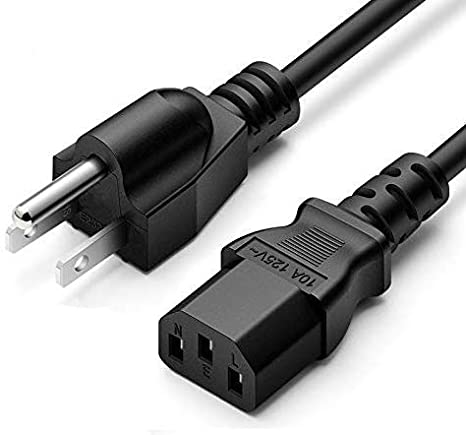
Connect the Power Cable to the back side of the Appliance (Point # 6  in the Figure above).

1. Connect the Appliance to the Internet using an Ethernet LAN cable to Top Ethernet Port as Shown in Figure Point # 12.
2. Now Connect the Network Switch to the Appliance by using a LAN cable. Connect one end to the&#x20;
3. Appliance's lower Ethernet Port
4. Connect Access Point to Network Switch
5. Turn on the appliance, by clicking on the power button as shown in the figure above point # 5. It takes approximately 1 minute before an Appliance is fully started.\
   \
   Note: If the Appliance’s button has a blue light on, it means it’s already on.
6. Now Check

* The Upper Back LAN / Internet Port has Lights Blinking as shown below
* Lower Back LAN / Network Port has lights Blinking as shown below
* The network Switch has Lights blinking as shown below
* An access point has lights blinking as shown below

<figure><img src="https://2174323930-files.gitbook.io/~/files/v0/b/gitbook-x-prod.appspot.com/o/spaces%2F-MkrAx-51uwuvDxM_Z3r%2Fuploads%2F3KxPNWm1AKUDDqxDbT8y%2Fimage.png?alt=media&amp;token=8bba86e3-c6b8-4e00-9b29-34b864547e68" alt=""><figcaption></figcaption></figure>

1. Connect Your POS/Laptop to the Wi-Fi that is connected to Network Switch
2. Once it’s connected, open <mark style="color:green;">**<http://my.foodbucket.io/admin>**</mark> in the browser and you should be able to see the screen given below. This is it. Login using the credentials provided by our Sales Staff.

<figure><img src="https://2174323930-files.gitbook.io/~/files/v0/b/gitbook-x-prod.appspot.com/o/spaces%2F-MkrAx-51uwuvDxM_Z3r%2Fuploads%2Frv1SDmB40NCUY5614KE4%2Fimage.png?alt=media&amp;token=e313e540-b275-4934-bc87-8871857c5ee8" alt=""><figcaption></figcaption></figure>

You do not need any interface to see if Appliance is working, however, in some cases, you might need to connect it to a monitor to see if there are any hardware errors. For that, just keep an LED with DVI to connect.

<figure><img src="https://2174323930-files.gitbook.io/~/files/v0/b/gitbook-x-prod.appspot.com/o/spaces%2F-MkrAx-51uwuvDxM_Z3r%2Fuploads%2FVtAkhyOMQDVpLB5OhjYp%2Fimage.png?alt=media&amp;token=2eaed81a-81d9-4411-af5f-bc3f58ad4ca8" alt=""><figcaption></figcaption></figure>


# POS installation / Setup

### Table of Contents

* Download
* Requirements

### Download

Our App is called **‘FoodBucket Unify‘** on [App Store](https://apps.apple.com/pk/app/foodbucket-unify/id1553877375) &[ Google Play](https://play.google.com/store/apps/details?id=com.iu.foodbucket.unify\&hl=en-IN) and for [Windows](https://apps.microsoft.com/store/detail/foodbucket-unify/9N7VGTRD93S3?hl=fr-dz\&gl=dz\&cid=msft_web_chart), find the link given below.

### Requirements

| Device      | OS Version | RAM | HDD / Hard Drive | Display Size | Display Resolution |
| ----------- | ---------- | --- | ---------------- | ------------ | ------------------ |
| iPad / iOS  | 14.4+      | 4G  | 300M             | 9.7″ +       | All                |
| Android Tab | 9.0+       | 4G  | 300M             | 9.7″+        | 1080               |
| Windows     | 10         | 4G  | 300M             | 1080         | 1080               |

Download on the [AppStore](https://apps.apple.com/pk/app/foodbucket-unify/id1553877375). Get it on [Google Play](https://play.google.com/store/apps/details?id=com.iu.foodbucket.unify\&hl=en-IN). Get it on [Windows.](https://apps.microsoft.com/store/detail/foodbucket-unify/9N7VGTRD93S3?hl=fr-dz\&gl=dz\&cid=msft_web_chart)

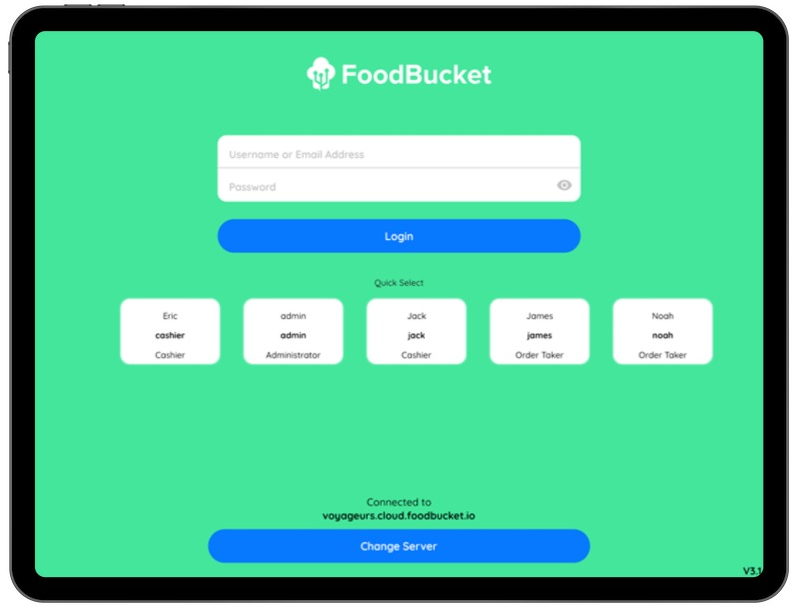
Simply Download and Install the app and you will see the following screen:

<figure><img src="https://2174323930-files.gitbook.io/~/files/v0/b/gitbook-x-prod.appspot.com/o/spaces%2F-MkrAx-51uwuvDxM_Z3r%2Fuploads%2F1IzOFVlKPQb8l42Vwrps%2Fimage.png?alt=media&amp;token=61def248-8fd5-48b9-98a6-7b6c92a6d12c" alt=""><figcaption></figcaption></figure>


# KDS Installation /Setup

Our KDS Setup is designed to keep it simple yet very solid. Our KDS Client is an enterprise-grade device that will work in all tough environments, however, you can also set up our KDS Software on an existing Windows OS.

## KDS Client Components

<figure><img src="https://2174323930-files.gitbook.io/~/files/v0/b/gitbook-x-prod.appspot.com/o/spaces%2F-MkrAx-51uwuvDxM_Z3r%2Fuploads%2F4wu8VP03wWPjxRPJigwd%2Fkds_client.png?alt=media&amp;token=68be4254-cf0d-4c63-ac57-8d565af90e81" alt="" width="201"><figcaption></figcaption></figure>

### Front and Back of a KDS Client

<figure><img src="https://2174323930-files.gitbook.io/~/files/v0/b/gitbook-x-prod.appspot.com/o/spaces%2F-MkrAx-51uwuvDxM_Z3r%2Fuploads%2FrUOV4q1ylhSs5bEWnPrc%2Fimage.png?alt=media&amp;token=2674dc80-6add-428c-9d93-9ee5efcb0b8d" alt=""><figcaption></figcaption></figure>

### **Back Side**

* The power port is where you will connect the Adapter
* USB port is where you will connect our KDS Keyboard
* Ethernet is where you will connect the LAN
* DVI/VGA is where you will connect the LED

### **Front Side**

* Power button to turn KDS on and off. When KDS Client is on its power light is GREEN.

## KDS Client Installation

In order to install a KDS Client, make sure you have all the required list of items:

<table data-view="cards"><thead><tr><th>Item</th><th>Picture</th></tr></thead><tbody><tr><td>A KDS Client</td><td><img src="https://2174323930-files.gitbook.io/~/files/v0/b/gitbook-x-prod.appspot.com/o/spaces%2F-MkrAx-51uwuvDxM_Z3r%2Fuploads%2FFpUoHeoE6F2MqRXI5K14%2Fimage.png?alt=media&amp;token=00c80add-797d-44ea-95fd-3b441d3ecb59" alt="" data-size="original"></td></tr><tr><td>A KDS Adapter</td><td><img src="https://2174323930-files.gitbook.io/~/files/v0/b/gitbook-x-prod.appspot.com/o/spaces%2F-MkrAx-51uwuvDxM_Z3r%2Fuploads%2FZ7XFDc5xg41KGQfCX32Z%2Fimage.png?alt=media&amp;token=16e53fd6-94cf-40fd-bb24-e081e5076530" alt=""></td></tr><tr><td>DVI Cable</td><td><img src="https://2174323930-files.gitbook.io/~/files/v0/b/gitbook-x-prod.appspot.com/o/spaces%2F-MkrAx-51uwuvDxM_Z3r%2Fuploads%2FuZRnVK0BIBwLlv1Au4be%2Fimage.png?alt=media&amp;token=e4f02f57-2855-44dd-b71f-10458bc0d8c4" alt=""></td></tr><tr><td>LAN Cable</td><td><img src="https://2174323930-files.gitbook.io/~/files/v0/b/gitbook-x-prod.appspot.com/o/spaces%2F-MkrAx-51uwuvDxM_Z3r%2Fuploads%2F9iVjWzIOXTXr7XL19ztM%2Fimage.png?alt=media&amp;token=69827107-10c4-45f3-ac64-a879b01bd3fa" alt=""></td></tr><tr><td>KDS Keyboard</td><td><img src="https://2174323930-files.gitbook.io/~/files/v0/b/gitbook-x-prod.appspot.com/o/spaces%2F-MkrAx-51uwuvDxM_Z3r%2Fuploads%2FR42qnYAKOL6RW7smPehH%2Fimage.png?alt=media&amp;token=a0c0c4b5-57ad-4208-adbb-719a1849db0e" alt=""></td></tr><tr><td>21″+ 1080 LED Screen</td><td><img src="https://2174323930-files.gitbook.io/~/files/v0/b/gitbook-x-prod.appspot.com/o/spaces%2F-MkrAx-51uwuvDxM_Z3r%2Fuploads%2FIWnWIvyEyXcpLZUiC5Kj%2Fimage.png?alt=media&amp;token=6a65fe92-c29f-4eec-a62a-3b95ad5800b1" alt="" data-size="original"></td></tr></tbody></table>

Note: Any LED with less than 1080 resolution will not perform properly for KDS and CDS. It’s mandatory to check if LED supports 1080. All modern 21″ LEDs are 1080. Also make sure it supports DVI, otherwise a DVI to HDMI converter will be required

## **Connection Diagram**

<figure><img src="https://2174323930-files.gitbook.io/~/files/v0/b/gitbook-x-prod.appspot.com/o/spaces%2F-MkrAx-51uwuvDxM_Z3r%2Fuploads%2F31IGcj25cN0gn3Vg9KMj%2Fimage.png?alt=media&amp;token=c0c1d3e3-6316-407f-b476-c16dceaf577b" alt=""><figcaption></figcaption></figure>

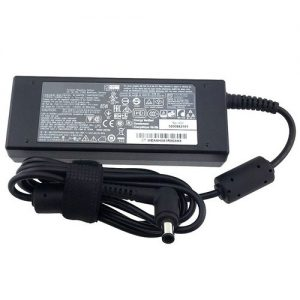
1. First, connect KDS Client Adapter to its Power socket on the back side
2. Connect DVI Cable on the backside of the KDS client and 2nd Part of the DVI Cable to your LED screen
3. Connect the LAN cable to the backside of the KDS client and 2nd part to the Network Switch of the FoodBucket Appliance
4. Now, turn on the KDS and you will see the following screen:&#x20;

<figure><img src="https://2174323930-files.gitbook.io/~/files/v0/b/gitbook-x-prod.appspot.com/o/spaces%2F-MkrAx-51uwuvDxM_Z3r%2Fuploads%2FxCYQzxWlmZW9UaqrlXLG%2Fimage.png?alt=media&amp;token=d4b0d6d3-6a95-46d8-8936-de20e4ba76f8" alt=""><figcaption></figcaption></figure>

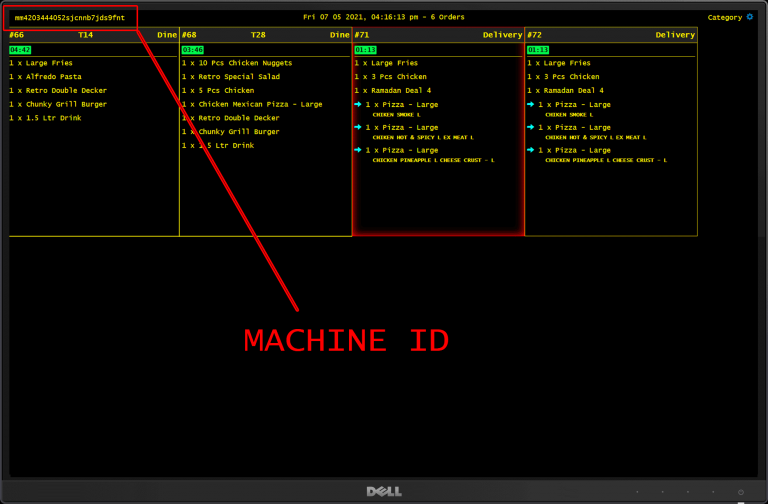
### Machine ID

Each KDS Screen has its Unique Machine ID. As soon as you connect it to the FoodBucket Network, you will see it on the top left of the KDS Screen, and the same Machine ID will also appear in KDS Manager. How to link it to a profile can be read[ here.](https://docs.foodbucket.io/kitchen-display-system/creating-and-linking-kds-profile)

## KDS Machine in KDS Manager

To find your machine in your KDS manager, follow the steps below:

1. Login to your admin area
2. Go to KDS from the Left Menu
3. Click on the Manager tab and there you will see your KDS Client with your Machine ID.
4. Click on the Edit icon to configure and Assign a profile

<figure><img src="https://2174323930-files.gitbook.io/~/files/v0/b/gitbook-x-prod.appspot.com/o/spaces%2F-MkrAx-51uwuvDxM_Z3r%2Fuploads%2FHOwJ8UwTQuw4IxDemGxL%2Fimage.png?alt=media&amp;token=4da9dc05-3e94-4ab9-ac9a-dc5363d591a0" alt=""><figcaption></figcaption></figure>


# Customer Facing Display

A Customer Facing Display (CFD) is a digital screen that displays information about the products and services offered by a business. FoodBucket provides a CFD that can be easily integrated with the Point of Sale (POS) system. Once integrated, the CFD will display the order information such as order number, items ordered, and total amount in a clear and easy-to-read format for customers to view.

### Benefits of Customer-Facing Display

CFD provides several benefits for both the business and the customers, including:

* Increased customer engagement: CFDs are a great way to keep customers engaged and informed about the products and services offered by the business. It can help customers to learn more about the products, special offers, and discounts.
* Improved customer experience: CFDs can enhance the customer experience by providing them with a clear view of their order information. This helps them to stay informed about the progress of their orders and feel more involved in the ordering process.
* Reduced order errors: With CFDs, customers can see their orders as they are being entered into the system. This can help reduce errors and improve order accuracy, leading to fewer order returns and increased customer satisfaction.
* Increased efficiency: CFDs can help reduce the workload for staff by allowing customers to view their orders without having to ask staff for updates. This increases efficiency in the kitchen and helps staff to focus on preparing orders.

### How to Use FoodBucket CFD

To use FoodBucket CFD, customers will need to place an order at the POS system. Once the order has been placed, the order information will be displayed on the CFD screen for the customer to view.

The CFD can be customized to display different types of information, such as promotional messages, menu items, or discounts. This allows businesses to tailor the CFD to their specific needs and requirements.

### Conclusion

In conclusion, Customer Facing Display is a valuable feature for businesses that want to increase customer engagement, improve customer experience, reduce order errors, and increase efficiency. FoodBucket provides an easy-to-use and customizable CFD that can help businesses achieve these goals.


# Printer & Device Setup

## Network Diagram <a href="#id-0-toc-title" id="id-0-toc-title"></a>

<figure><img src="https://2174323930-files.gitbook.io/~/files/v0/b/gitbook-x-prod.appspot.com/o/spaces%2F-MkrAx-51uwuvDxM_Z3r%2Fuploads%2FSBsk4fKRMSKrP9GNuyum%2Fimage.png?alt=media&amp;token=1c2f3d01-a9f0-4f45-ad4b-f8cc53cac1e3" alt=""><figcaption></figcaption></figure>

## Label Printer

#### Supported Devices

* Toshiba BVDE

#### Add a new label printer

1. Login to your **Admin Panel / Backend Area.**
2. Go to **System > Printers** from the menu on the left.
3. Click on **"Add New Printer".**
4. Enter the following details:
   * **Printer Title**: For your printer identification.
   * **Printer Type**: Which type your printer is eg. Label, Thermal, etc?
   * **Printer Location**: Where your printer will be located in your restaurant.
   * **Printer IP**: What is your printer IP Address?
   * **Printer Port**: What is your printer Port? The default port of the printer is 9100.
5. Click on **"Add New Printer"** on the right bottom of the modal box.

### Connect a label printer to the KDS Screen

1. Go to KDS from the menu on the left.
2. Under the Profiles tab, you will see **"Add New Profile"** or select the existing one.
3. Add/enter the profile details and further down you will see the Label Printer toggle button.
4. Make sure you turn it ON.
5. Select your printer from the Available Printers dropdown.
6. Filter out the categories you want to get printed from the printer.
7. That’s it, you should be all set up now.

## Thermal Printer

#### Supported Devices

* Epson TM88VI
* Epson T-90
* Black Copper

### Add a new thermal printer

1. Open your FoodBucket app.
2. Click on the top left menu.
3. Click on **Settings**.
4. Under the system settings, click on **Printers & Hardware**.
5. Under the printer settings, click on **Add New Printer**.
6. Under the Add New Printer, you will see the following fields:

<table><thead><tr><th width="304">Fields</th><th>Usage</th></tr></thead><tbody><tr><td>IP Address</td><td><em>Your printer IP address e.g. 100. x.x.x, etc. (you can manually enter the IP Address or use the Find Printer button next to the IP Address field).</em></td></tr><tr><td>Location</td><td><em>It is an optional field. It is your printer location where the printer is located. e.g. Kitchen, Cash Counter, etc.</em></td></tr><tr><td>Name</td><td>Your Printer name can be anything.</td></tr></tbody></table>

1. Click on **Save** in the Bottom.
2. Tap on your added printer and click **Test Printer** to test if the printer is actually connected or not.
3. If the printer is successfully connected it should print a test receipt.
4. If the printer is not connected it won’t respond to the test print.

### Printer Modification

**Print Attributes**

| Fields                          | Usage                                                                                                                 |
| ------------------------------- | --------------------------------------------------------------------------------------------------------------------- |
| Copy Type                       | If you disable Copy Type, the Customer Copy will not be visible on receipts.                                          |
| Order Type                      | If you disable Order Type, it won’t show any order type eg. Dine, Take Away, Delivery.                                |
| Note                            | If you disable Note, it won’t be visible on the receipt.                                                              |
| Void Reason                     | Mentioned in the image.                                                                                               |
| Meal or Deal Items              | Mentioned in the image.                                                                                               |
| Previous Items on Running Order | If you disable this, it will not Print Previous items on Running Order, it will print only Running Order on Receipts. |
| Tagline                         | Mentioned in the image.                                                                                               |
| Footer Note                     | Mentioned in the image.                                                                                               |
|                                 |                                                                                                                       |

**Print Receipt / KOT ( Kitchen Order Ticket)**

| Fields                                              | Usage                                                   |
| --------------------------------------------------- | ------------------------------------------------------- |
| Printer Type                                        | Kitchen receipt/Customer receipt.                       |
| Print receipt automatically when a purchase is made | Toggle on & off to handle print receipts automatically. |
| Print Customer Copies                               | *No. of Customer Copies*                                |
| Print Merchant Copies                               | *No. Merchant Copies*                                   |
| Print Kitchen Copies                                | *No. of Kitchen Copies*                                 |

### **Receipt Management**

* **Filter Receipts** *\~ Toggle on & off to turn on the filter applied.*
* **Customize** *\~ Click on customize to filter out your receipt.*

#### **Customize**

If you want to customize and filter your receipt, first of all, turn on the **Filter Receipt** option available in settings and click on **Customize.** A modal box will appear with three following options:

* Categories
* Menus
* Excludes

**Categories**

**Only** the selected categories will be printed on the **KOT Receipt** if you select the categories and **Save** them from the top right corner of the modal box.

**Menus**

**Only** selected Menus will be printed on the **KOT Receipt** if you select the **Menus** and **Save** them from the top right corner of the modal box.

**Excludes**

If you select the Excludes and **Save** them from the top right corner of the modal box then the selected excludes will **not** be printed on the **KOT Receipt.**


# KDS Overview

Our masterpiece, crown jewel, the famous FoodBucket Kitchen Display System™ helps large-scale restaurants streamline their operations and achieve maximum output.

KDS Increases efficiency, eliminates human errors, and focuses on faster deliveries that result in more sales.

## The FoodBucket Kitchen Display Screen™ <a href="#id-0-toc-title" id="id-0-toc-title"></a>

<figure><img src="https://2174323930-files.gitbook.io/~/files/v0/b/gitbook-x-prod.appspot.com/o/spaces%2F-MkrAx-51uwuvDxM_Z3r%2Fuploads%2FvFyiLWc2yrcfBVQq6JCO%2Fimage.png?alt=media&amp;token=6140b754-cfef-4beb-a3d2-1e9326479f8a" alt="" width="563"><figcaption></figcaption></figure>

A kitchen display screen has many components. As you see the numbers above, the following are its details:

* Name of the screen e.g. Dispatcher, Pizza Topping, Fryer, etc.
* The current time of the day and total no. of active orders
* Category of the screen. This is different from the name for example **packaging** screen name which only packs **pizzas**
* Single order details with menu items, options, and deals.
* List of orders in the waiting.
* Usually, our KDS displays 8 orders at once but it can be configured.

### Order Box

One order box, beautifully designed to help our chefs to see what to cook. Refer to the image below to see what items are displayed in one order box:

<figure><img src="https://2174323930-files.gitbook.io/~/files/v0/b/gitbook-x-prod.appspot.com/o/spaces%2F-MkrAx-51uwuvDxM_Z3r%2Fuploads%2FfI3shYsQYyr9NEurNkJi%2Fimage.png?alt=media&amp;token=5a114f7e-7ee0-4f82-aa0a-7571e417af2c" alt="" width="223"><figcaption></figcaption></figure>

The image above is taken from our KDS screen with an order that is being currently selected. A Selected Order Box has a slight reddish shade. The following are the elements of one order box:

* Order Number
* Table Number if order type is dine-in
* Order Type
* Time since the order was punched in minutes/seconds
* A single menu item with 1 quantity
* A deal with multiple menu items
* Menu option and/or menu item note
* A menu item that has been cooked

### KDS Client

<figure><img src="https://2174323930-files.gitbook.io/~/files/v0/b/gitbook-x-prod.appspot.com/o/spaces%2F-MkrAx-51uwuvDxM_Z3r%2Fuploads%2F4wu8VP03wWPjxRPJigwd%2Fkds_client.png?alt=media&amp;token=68be4254-cf0d-4c63-ac57-8d565af90e81" alt="" width="201"><figcaption></figcaption></figure>

Our branded, premium-quality Kitchen Display Clients are plug & play devices that come with a pre-installed KDS Operating System by FoodBucket. All you have to do is connect these devices with an LED and network and assign a profile from Admin Panel to start using your KDS System.

Our KDS Client is highly durable and works perfectly fine in a tense heated and round-the-clock environment. Our KDS Client can be purchased separately from our online store.

### KDS Bar/KDS Keyboard

<figure><img src="https://2174323930-files.gitbook.io/~/files/v0/b/gitbook-x-prod.appspot.com/o/spaces%2F-MkrAx-51uwuvDxM_Z3r%2Fuploads%2FR42qnYAKOL6RW7smPehH%2Fimage.png?alt=media&amp;token=a0c0c4b5-57ad-4208-adbb-719a1849db0e" alt="" width="375"><figcaption></figcaption></figure>

Our other state-of-the-art, simplistic Kitchen Display System Keyboard makes us stand out from all other simple POS systems. We took a leap by designing an elegant yet simple-to-operate KDS Bar which works without a touch screen and gives feedback with a button-click sound.

We use high-quality, long-lasting buttons to keep kitchen operations always running. Refer to one of our model’s images below (computerized):

Following are the simple operations that our keyboard performs:

* Navigation keys with arrow signs to move around the KDS screen. Selected orders will have a reddish shade/border
* Green Button: For completing the item job. It could be topping, frying, or cooking, and will be removed from the screen if configured.
* Red Button: To recall the item accidentally marked completed.
* Blue Button (could be in white or black): To refresh the KDS screen.

### KDS Bell

Our system also supports the KDS bell. Whenever there is a new order punched from the POS, it will beep a sound to alert the chefs or kitchen staff about the new order (if speakers are attached to KDS Client).

This bell can be configured from the KDS profile section.

<mark style="background-color:red;">**Note:**</mark> <mark style="background-color:red;"></mark><mark style="background-color:red;">FoodBucket’s Kitchen Display System is a registered trademark & copyright product of Integrated Units Pvt. Ltd. In case we find it’s duplication or idea copying, legal action will be taken.</mark>


# Connecting to Server with KDS App

## Overview

Kitchen Display System works greatly on-premise and not many are able to make it full-cloud compatible. But not us, we have got you covered. Whether On-Premise, offline, or on the cloud, your things are up, live, and securely connected.

We now support KDS App for those who cannot get our KDS Client.

Here is what it looks like:

<figure><img src="https://2174323930-files.gitbook.io/~/files/v0/b/gitbook-x-prod.appspot.com/o/spaces%2F-MkrAx-51uwuvDxM_Z3r%2Fuploads%2FJR66dNQOH6sp0Z4kQRb6%2Fimage.png?alt=media&amp;token=32c3acb6-ede9-44d0-99a9-48fab82fe439" alt="" width="563"><figcaption></figcaption></figure>

### KDS Code

A KDS Code is a unique secret code that is generated automatically for each setup. You can find your KDS Code by following these steps:

1. Login to your Admin Area/Backend
2. Go to **KDS** from the left menu
3. There you will see a KDS Code on the top right corner of the screen as shown below:

<figure><img src="https://2174323930-files.gitbook.io/~/files/v0/b/gitbook-x-prod.appspot.com/o/spaces%2F-MkrAx-51uwuvDxM_Z3r%2Fuploads%2FcY5qmUW4JL1skvhvM2lA%2Fimage.png?alt=media&amp;token=57e61178-0d73-4819-8c81-2bb958f29bd6" alt="" width="563"><figcaption></figcaption></figure>

### Downloading & Display

1. Download our KDS App.
2. Click on the downloaded file and install it.
3. Now from Start Menu, search **FoodBucket KDS**
4. Click on FoodBucket KDS App and the following window shall appear:

<figure><img src="https://2174323930-files.gitbook.io/~/files/v0/b/gitbook-x-prod.appspot.com/o/spaces%2F-MkrAx-51uwuvDxM_Z3r%2Fuploads%2FXCwuWMKyh3GZFIJ6BjJa%2Fimage.png?alt=media&amp;token=f68066b2-6609-4969-8a24-80c67a5b1258" alt="" width="563"><figcaption></figcaption></figure>

1. HTTP / HTTPS Protocol, usually HTTPS
2. URL Unique identifier to your cloud
   * for On-Premise, you can simply use my.foodbucket.io
   * for Cloud, use youridentifier.cloud.foodbucket.io
3. PORT is usually 80 or 4848 or leave blank for default settings
4. Your KDS Code can be obtained from the admin panel as shown here
5. Verify button to check the connection
6. Machine ID that is displayed in the back-end for profile assignment, read more about it here

### Installation

1. Use HTTPS for the cloud and HTTP for On-premise
2. Now, first, enter your restaurant URL
   * for On-Premise, you can simply use my.foodbucket.io
   * for Cloud, use youridentifier.cloud.foodbucket.io
3. Leave PORT blank or enter as instructed by the account manager
4. Enter your KDS Code
5. Click on Verify
6. Once verification is successful, you can see the following screen.
7. You will notice that it has the same machine ID that you saw when you first opened the app.

<figure><img src="https://2174323930-files.gitbook.io/~/files/v0/b/gitbook-x-prod.appspot.com/o/spaces%2F-MkrAx-51uwuvDxM_Z3r%2Fuploads%2FflLhajo7cgMrF1xdM0M9%2Fimage.png?alt=media&amp;token=c422a6e4-d69b-4a9e-86e4-ecbe18b182ce" alt="" width="563"><figcaption></figcaption></figure>


# Creating & Linking KDS Profile

## KDS Profiles

The KDS profile is the configuration of your KDS machine. Here you can fully customize your KDS machine according to your requirements.

### Pictorial Reference

<figure><img src="https://2174323930-files.gitbook.io/~/files/v0/b/gitbook-x-prod.appspot.com/o/spaces%2F-MkrAx-51uwuvDxM_Z3r%2Fuploads%2Fx9i04jH81PG212PXfUdV%2Fimage.png?alt=media&amp;token=2a2a8c00-55cc-4c33-8803-dc880bf7910f" alt="" width="563"><figcaption></figcaption></figure>

### Add new KDS profile

1. Click on the **+ Add New Profile** button at the top left corner.
2. A modal box will popup and you will see the following fields:

| Fields                                  | Usage                                                                                                        |
| --------------------------------------- | ------------------------------------------------------------------------------------------------------------ |
| Profile name                            | Your unique profile name can be anything.                                                                    |
| Screen name                             | Your screen name will be displayed on your machine screen.                                                   |
| Screen width                            | You can set your screen width according to your screen resolution. By default the screen width is 1920.      |
| Screen height                           | You can set your screen height according to your screen resolution. By default the screen width is 1080.     |
| Kitchen status                          | Its the status of your menu item. In which state it will be displayed on your screen.                        |
| Kitchen action                          | It’s the status of your menu item which will be updated from your screen.                                    |
| Category name                           | The category name will be displayed on the KDS screen.                                                       |
| Categories                              | Filter out the categories which you want to see on the KDS screen.                                           |
| Exclude categories                      | Select the categories which you don’t want to see on the KDS screen.                                         |
| Special categories                      | Select the special categories which will be highlighted on the KDS screen.                                   |
| Rows to display                         | A number of rows to display on the KDS screen.                                                               |
| Columns to display                      | A number of columns to display on the KDS screen.                                                            |
| Skip                                    | A number of orders you want to skip from the screen.                                                         |
| Order Manager - Kitchen                 | If you only want to change the order state in the kitchen.                                                   |
| Order Manager - Customer Screen Manager | It will change the status on the CDS screen.                                                                 |
| Item selection                          | Toggle on/off item selection to choose every item individually available in the order box on the KDS screen. |
| Print labels                            | Toggle on/off for your label printer on the screen.                                                          |
| Available printers                      | List of the added label printers.                                                                            |
| Label printer categories                | Choose from your categories which one of them you want to print from the label printer.                      |
| KDS bell                                | Toggle on/off for your KDS bell when the new order arrives.                                                  |
| KDS bell sound                          | List of available sounds for KDS bell.                                                                       |

3. Fill out the fields according to your custom requirements and click on the **+Add** button located in the bottom right corner of your modal box.

### Edit a KDS Profile

1. Click on the **pencil icon** on the left side of the table.
2. A modal box will pop up with the same fields as defined in **Add a New Profile**. You can edit everything here.
3. Once you are done editing, click on the **Update** button at the bottom right corner of the modal box.

### Delete a KDS profile

1. You can also delete a KDS profile whenever you want by clicking on the **Delete button** on the right side of your table.
2. Configurations of the connected KDS Machine will be reset to default after deleting the KDS Profile.

### Linking KDS Profile

Once your machine is connected and linked to the system it will be listed under the **Manager** tab. In case you don’t know how to install and set up the KDS machine you can find it[ **here**.](https://docs.foodbucket.io/installation-and-setup/kds-installation-setup)

### **Pictorial Reference**

<figure><img src="https://2174323930-files.gitbook.io/~/files/v0/b/gitbook-x-prod.appspot.com/o/spaces%2F-MkrAx-51uwuvDxM_Z3r%2Fuploads%2FhAFzHRwsFSe5e333Usz7%2Fimage.png?alt=media&amp;token=664d47da-4d53-4f55-b8ec-32ce8f6af85e" alt="" width="563"><figcaption></figcaption></figure>

## **Link KDS profile with machine**

1. Once your machine is on the list you can attach a KDS profile
2. Click on the pencil icon to attach a KDS profile.
3. A modal box will popup and you will see the following fields:

| Fields       | Usage                                          |
| ------------ | ---------------------------------------------- |
| Machine name | A unique name to your machine can be anything. |
| Machine Role | Set the machine role to KDS.                   |
| Profile Name | Profile names will be listed here which you    |

4. Once done, click on the Update button in the bottom right corner of the modal box.
5. Your Machine is successfully linked to the KDS profile.


# KDS Controls

FoodBucket’s KDS Keyboard / KDS Bump Bar is one of the easiest keyboard designed in the entire restaurant industry. It requires literally zero knowledge to operate our KDS system. it’s simple, understandable and most importantly it’s addictive.

&#x20;

<figure><img src="https://foodbucket.io/wp-content/uploads/2021/05/kds_bar_labeled.png" alt=""><figcaption></figcaption></figure>

&#x20;

## Navigation Keys <a href="#id-0-toc-title" id="id-0-toc-title"></a>

Arrow navigation keys are to move your selection on a KDS screen. Our old KDS keyboards do not have arrow keys but the placement and purpose is the same.

A selected order box is always shown with a reddish shade/border.

&#x20;

### Action Keys <a href="#id-1-toc-title" id="id-1-toc-title"></a>

There are 3 Action Keys on our Keyboard:

### **Done Key (Green)**

The done key is to mark an action as completed or done. Each staff member is assigned a role in KDS from which they change their status. It could be **‘cooking’, ‘cooked’, or ‘served’.**

### **Recall/Cancel Key (Red)**

A Recall or a Cancel Key is to undo what’s done. For example, if you want to call back your previously done order or item that is accidentally marked as cooked, you can simply press the red button and it will bring it back to old status.

### **Refresh Key (Blue/White/Black)**

A Refresh key could be **Blue/White/black** in color, depending on which variant of the keyboard you are using. However, its placement will always be the same and its color will not be Green or Blue. Its only purpose is to refresh the KDS screen in case you feel KDS data is not updated.


# KDS Roles, Usages & Workflows

Our Kitchen Display system is not just another interface of the order window or order screen. It’s a complete Operational System that helps you move way faster than your conventional mean.

Considering the requirement of how people work in the kitchen, we designed our KDS to match any kind of process without changing their workflows. Our KDS has the following key areas:

1. Machine Role
2. KDS Profile
3. Order Manager
4. Kitchen Status
5. Kitchen Action

## Machine Role

&#x20;A KDS Machine Role is to set whether the KDS Client is used for Kitchen Display or for the customer. See the screen below to see the difference:

<figure><img src="https://2174323930-files.gitbook.io/~/files/v0/b/gitbook-x-prod.appspot.com/o/spaces%2F-MkrAx-51uwuvDxM_Z3r%2Fuploads%2FFgLxm0tqOEfnicD1gKjp%2Fimage.png?alt=media&amp;token=c778a84a-b011-4dd1-b77e-018c381d82aa" alt=""><figcaption></figcaption></figure>

To set or change the KDS Role, follow the steps below:

1. Log in to Admin **Area/Backend**
2. Go to **KDS** from the left menu
3. Select **Manager** from the tabs on the top
4. Click on the **‘Edit / Pencil‘** icon and a modal box will appear
5. Set the role as per your requirement and click update to save changes

<figure><img src="https://2174323930-files.gitbook.io/~/files/v0/b/gitbook-x-prod.appspot.com/o/spaces%2F-MkrAx-51uwuvDxM_Z3r%2Fuploads%2Ffg6s7uL8XI62QpsKTJQI%2Fimage.png?alt=media&amp;token=2e026797-a365-4425-adf5-de2d49d00594" alt="" width="563"><figcaption></figcaption></figure>

## KDS Profile

&#x20;One of the key features of our KDS is the KDS Profile system. Each Machine/KDS Client is assigned a KDS Profile. This profile is configured carefully to define its functionality.

Read this documentation to create a KDS Profile.

In your KDS Profile, you have 3 Items: Kitchen Status, Kitchen Action & Order Manager.

### Kitchen Status

&#x20;Kitchen status is to display what to show on KDS Screen.

<figure><img src="https://2174323930-files.gitbook.io/~/files/v0/b/gitbook-x-prod.appspot.com/o/spaces%2F-MkrAx-51uwuvDxM_Z3r%2Fuploads%2F0ygIt4uibJGYhR9z5M9S%2Fimage.png?alt=media&amp;token=09d8ae05-7367-4fb9-91df-9b8304f53ec9" alt="" width="563"><figcaption></figcaption></figure>

Kitchen status is what kind of menu items will be displayed on the screen.

| Field Value | Purpose                                                                                                                                                                                                                                                                                                                                                               |
| ----------- | --------------------------------------------------------------------------------------------------------------------------------------------------------------------------------------------------------------------------------------------------------------------------------------------------------------------------------------------------------------------- |
| Processing  | Show items that are not yet cooked or being cooked. For example, Fryer Screen will see ‘Fried Chicken’, Pizza Topping will see ‘Margarita Pizza XL’                                                                                                                                                                                                                   |
| Cooking     | Show items on the screen that are being cooked. This step can be skipped however it comes very handy for a chain work. For example, once a Pizza Topping Screen Manager dresses a Pizza and puts it in the oven, it will press the Green button and item status will turn to ‘Cooking’ and will be displayed on KDS Screen where Kitchen Status was set to ‘Cooking’. |
| Completed   | Show items that are completed. Only completed items are displayed on this for screens such as Mediator, Dispatcher or Packing.                                                                                                                                                                                                                                        |

### Kitchen Action

&#x20;A Kitchen Action is what to perform when Green Button is pressed.

| Scenario              | Kitchen Display | Kitchen Action | Output on Pressing Green     |
| --------------------- | --------------- | -------------- | ---------------------------- |
| Cooking Screen        | Processing      | Completed      | Will mark item as Completed. |
| Topping/Baking Screen | Processing      | Cooking        | Will mark item as Cooking.   |
| Serving/Cutting       | Cooking         | Completed      | Will mark item as Completed. |

### Order Manager

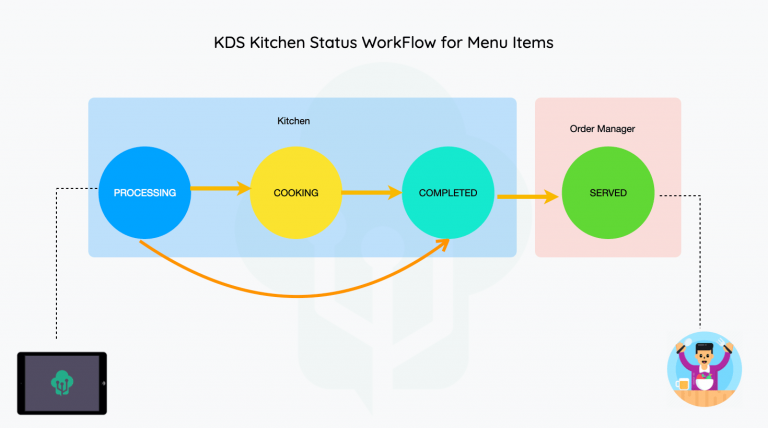
&#x20;This is the role that we assign to a manager. There are 3 roles as stated below, but first have a look at the flow:

<figure><img src="https://2174323930-files.gitbook.io/~/files/v0/b/gitbook-x-prod.appspot.com/o/spaces%2F-MkrAx-51uwuvDxM_Z3r%2Fuploads%2F0ygIt4uibJGYhR9z5M9S%2Fimage.png?alt=media&amp;token=09d8ae05-7367-4fb9-91df-9b8304f53ec9" alt="" width="563"><figcaption></figcaption></figure>

| Role                       | Purpose                                                                                                                                                                                        | Scope                                                                                                                                                                        | Kitchen Status                 | Kitchen Action     |
| -------------------------- | ---------------------------------------------------------------------------------------------------------------------------------------------------------------------------------------------- | ---------------------------------------------------------------------------------------------------------------------------------------------------------------------------- | ------------------------------ | ------------------ |
| Kitchen                    | This role is assigned to people working in the kitchen, Cooking, Baking, Cutting etc.                                                                                                          | <p><strong>Menu Items</strong><br>They can only make changes to menu items and not to the order.</p>                                                                         | Processing, Cooking, Completed | Cooking, Completed |
| Order Manager / Dispatcher | This role is assigned to a Manager or Dispatcher. This person manages the Order Workflow and can see all menu items and their current state.                                                   | <p><strong>Order</strong><br>This can control the whole order. If Dispatcher presses the Green button, all items whether completed or not, will be changed to completed.</p> | Processing, Cooking, Completed | Served             |
| Customer Manager           | This is same as Dispatcher. The only difference is a Customer Manager Takes Completed order and mark it as Served This is handy in a Fast Food Service where Customer Display Screen is Shown. | **Order**                                                                                                                                                                    | Served                         | Completed          |


# Customer Display System

## Customer Display System for FoodBucket

Customer Display System (CDS) is a feature that allows customers to view their order information in real time as it is being prepared. CDS is an effective way to keep customers engaged and informed about their orders, and it can also help reduce errors and improve order accuracy.

FoodBucket provides a CDS that can be easily integrated with the Point of Sale (POS) system. Once integrated, the CDS will display the order information such as order number, items ordered, and total amount in a clear and easy-to-read format.

### Benefits of Customer Display System

* Improved customer experience: Customers are able to view their order information in real-time which helps them feel more engaged and informed about their orders. This helps to improve customer satisfaction and loyalty.
* Reduced order errors: With CDS, customers can see their orders as they are being prepared, which can help reduce errors and improve order accuracy. This leads to fewer order returns and increased customer satisfaction.
* Increased efficiency: CDS allows customers to view their orders without having to ask staff for updates, which can help reduce the workload for staff and increase efficiency in the kitchen.

### How to Use FoodBucket CDS

To use FoodBucket CDS, customers will need to place an order at the POS system. Once the order has been placed, the order information will be displayed on the CDS screen for the customer to view.

The CDS can be customized to display different types of information, such as promotional messages, menu items, or discounts. This allows businesses to tailor the CDS to their specific needs and requirements.

### Conclusion

In conclusion, Customer Display System is a valuable feature for businesses that want to improve customer experience, reduce order errors, and increase efficiency. FoodBucket provides an easy-to-use and customizable CDS that can help businesses achieve these goals.


# KDS Troubleshooting


# Overview

FoodBucket comes with an extensive Admin Area/Backend office that allows you to control, monitor, manage, and plan, literally, everything that you need to run a Restaurant.

Our main aim is to provide an easy-to-use interface and as detailed as possible to analyze what’s happening. We focus highly on customer feedback. If you have anything to share or to say, please write us an email or leave feedback.

### Admin Area Access

#### On-Premise (Appliance)

If you have our Appliance installed in your restaurant, you can easily access our backend by following the steps below:

1. Connect to FoodBucket Network Wi-Fi
2. Open **Google Chrome/Safari/Microsoft Edge**
3. <http://my.foodbucket.io/admin>

#### For Cloud:

1. Open **Google Chrome/Safari/Microsoft Edge**
2. **<http://youridentifer.cloud.foodbucket.io/admin>**

### Login Screen

* **Username**: your unique username or email address
* **Password**: your password is provided by our sales representative if installed On-Premise. For Cloud, you will set your own password. You can also record your password by using the “Forgot Password” feature.

This is how the login screen is displayed:

<figure><img src="https://2174323930-files.gitbook.io/~/files/v0/b/gitbook-x-prod.appspot.com/o/spaces%2F-MkrAx-51uwuvDxM_Z3r%2Fuploads%2FZmlkFya574u5ATaA4OfV%2Fimage.png?alt=media&amp;token=2dd3c27f-9c18-4abc-b973-a604b7d710e4" alt="" width="375"><figcaption></figcaption></figure>

### Admin Interface

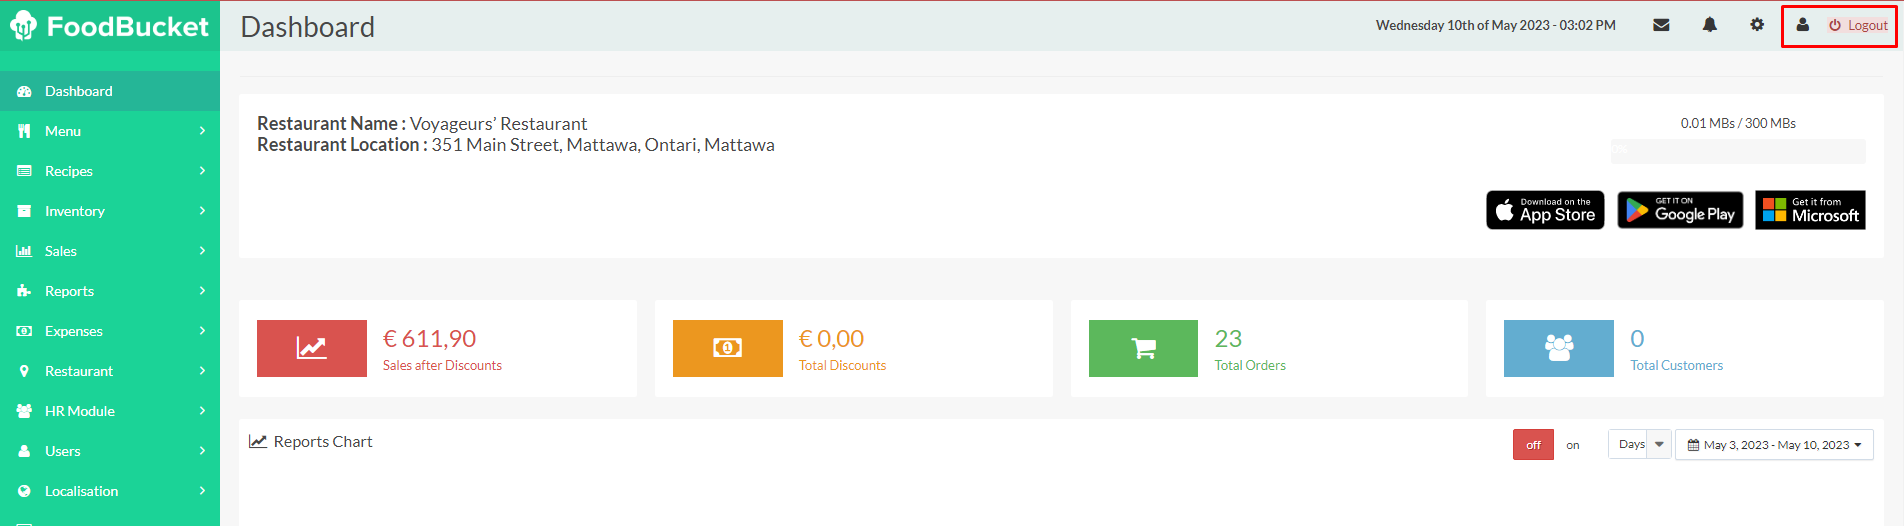
Our interface is quite self-explanatory. See the image below to get a quick understanding:

<figure><img src="https://2174323930-files.gitbook.io/~/files/v0/b/gitbook-x-prod.appspot.com/o/spaces%2F-MkrAx-51uwuvDxM_Z3r%2Fuploads%2FatrUqcA7YAPgbLvl6N5l%2Fimage.png?alt=media&amp;token=154764cb-4199-4bb9-b57d-93f6b426c6de" alt=""><figcaption></figcaption></figure>

#### Left Menu

To navigate through the Admin area, you can use our menu on the left. It is categorized in a very compact manner to help you move around the admin area very easily.

#### Right Top Menu

Online Status (for On-Premise), notification, and user profile settings are managed from the top right menu. This also helps you easily go to Settings by clicking on the gear icon on update user profile settings.

### Logout

In order to log out, click on ‘User Icon‘ in the top right menu, and click on ‘Logout‘.<br>

<figure><img src="https://2174323930-files.gitbook.io/~/files/v0/b/gitbook-x-prod.appspot.com/o/spaces%2F-MkrAx-51uwuvDxM_Z3r%2Fuploads%2FUVy2Xclrp9zKyK3JCwpZ%2Fimage.png?alt=media&amp;token=5afb58ee-6918-44d1-8a59-3aa5bc1153cd" alt=""><figcaption></figcaption></figure>


# Settings & Configurations

You can go to settings from the left panel. From settings, you have the tabs of General, Restaurant, Options, Order, Receipt, Reservation, Image Manager, Mail, Custom Sales Head, and Payment Methods.

## General

The general tab has the following settings:

<figure><img src="https://2174323930-files.gitbook.io/~/files/v0/b/gitbook-x-prod.appspot.com/o/spaces%2F-MkrAx-51uwuvDxM_Z3r%2Fuploads%2Fropt1Bje4GUNVQ6DR5Zk%2Fimage.png?alt=media&amp;token=65d89a0a-250d-4fc8-941c-3b0e9c43717d" alt=""><figcaption></figcaption></figure>

You can change the website settings including the name of the restaurant, email address, tagline, and NTN. You can also add the restaurant logo, and CDS (customer display screen) background image. For SEO of the website, you can add Meta Description and Meta Keyword too.

<figure><img src="https://2174323930-files.gitbook.io/~/files/v0/b/gitbook-x-prod.appspot.com/o/spaces%2F-MkrAx-51uwuvDxM_Z3r%2Fuploads%2FCK23euKjmRTOfHjdt0d2%2Fimage.png?alt=media&amp;token=a913fff6-6b48-47ec-b0b0-40485dd75f9b" alt="" width="474"><figcaption></figcaption></figure>

### Restaurant

From the Restaurant tab, you can set country, map, currency and language, and date/time for your restaurant system.

### Location

**Country**

You can add the country by dropdown menu.

**Master Mode**

You can add multi-locations to your FoodBucket system by disabling Master Mode.

**Location**

You can add a location from the dropdown menu or you can also add a new location by clicking on the “Add new location” button. Please read the complete documentation of the location here.

<figure><img src="https://2174323930-files.gitbook.io/~/files/v0/b/gitbook-x-prod.appspot.com/o/spaces%2F-MkrAx-51uwuvDxM_Z3r%2Fuploads%2Fzj6nWaQQGNdE5c9ZRSBC%2Fimage.png?alt=media&amp;token=32ceddeb-502a-4bd3-8c9f-6f92c52f95d0" alt=""><figcaption></figcaption></figure>

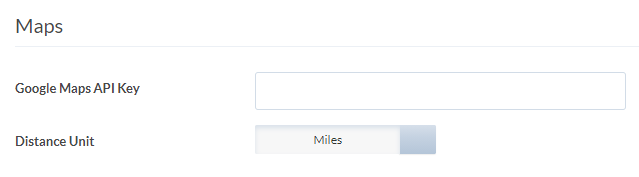
### Maps

**Google Maps API Key**

You can add Google Map API Key for pin location. Kindly follow the steps mentioned here to generate the API key of your location.

**Distance Unit**

You can switch between miles to kilometers with the button.

<figure><img src="https://2174323930-files.gitbook.io/~/files/v0/b/gitbook-x-prod.appspot.com/o/spaces%2F-MkrAx-51uwuvDxM_Z3r%2Fuploads%2FFiAc9L9zhYxp3n1EvIGj%2Fimage.png?alt=media&amp;token=dcf4ec81-f17e-4369-b4bc-10489da2a506" alt=""><figcaption></figcaption></figure>

### Currency

**Default Currency**

You can select the default currency from the dropdown menu.

**Auto Update Rates**

Set whether to update currency rates automatically every 24 hours or manually. Currency rates are imported from the Yahoo finance database.

**Accepted Currency**

Select all currencies that you accept as payment as well as your default currency.

<figure><img src="https://2174323930-files.gitbook.io/~/files/v0/b/gitbook-x-prod.appspot.com/o/spaces%2F-MkrAx-51uwuvDxM_Z3r%2Fuploads%2FUcbyE0nKHBfMULkaw9K2%2Fimage.png?alt=media&amp;token=f4e5f66d-9245-4150-9720-9b04ab4bafd1" alt=""><figcaption></figcaption></figure>

### Language

**Default Language**

You can select the default language from the dropdown menu.

**Admin Default Language**

You can select the admin area/backend default language from the dropdown menu.

**Detect Browser Language**

Enable or disable user browser language detection. If enabled FoodBucket will be translated to the browser language.

<figure><img src="https://2174323930-files.gitbook.io/~/files/v0/b/gitbook-x-prod.appspot.com/o/spaces%2F-MkrAx-51uwuvDxM_Z3r%2Fuploads%2FCwu56tE0OToVmHLqPPLG%2Fimage.png?alt=media&amp;token=952fcb31-54f3-461e-826c-b39181229105" alt=""><figcaption></figcaption></figure>

### Date/Time

**Default Time zone**

Set the default time zone. Choose a city in the same time zone as your restaurant.

**Date Format**

Select the date format from the available option.

**Time Format**

Select the time format from the available option.

<figure><img src="https://2174323930-files.gitbook.io/~/files/v0/b/gitbook-x-prod.appspot.com/o/spaces%2F-MkrAx-51uwuvDxM_Z3r%2Fuploads%2F8sOlst8wRY0x4BSHEDbe%2Fimage.png?alt=media&amp;token=7414fa6e-b402-4307-a325-60f01b503e10" alt=""><figcaption></figcaption></figure>

## Options

### Menus

<figure><img src="https://2174323930-files.gitbook.io/~/files/v0/b/gitbook-x-prod.appspot.com/o/spaces%2F-MkrAx-51uwuvDxM_Z3r%2Fuploads%2Fo7IV2xNj3pe6aAlSL9OC%2Fimage.png?alt=media&amp;token=927a4ddd-9af3-4ea7-9a07-bf93d3b90abb" alt=""><figcaption></figcaption></figure>

**Items Per Page**

Limit how many items are shown per page

**Menus Per Page**

Limit how many menus are shown per page

**Show Menu Images**

Show or hide menu images on the view menu page

**Specials Category**

Select which category to use automatically for special menus

<figure><img src="https://2174323930-files.gitbook.io/~/files/v0/b/gitbook-x-prod.appspot.com/o/spaces%2F-MkrAx-51uwuvDxM_Z3r%2Fuploads%2F1hCgerYsHCgVDShjVZQX%2Fimage.png?alt=media&amp;token=228f6bcc-3943-4c6c-b646-78166917901a" alt=""><figcaption></figcaption></figure>

### Taxation

**Tax Mode**

Set whether to enable or disable calculating tax in the storefront

**Tax Menu Price**

Set whether the menu price already includes taxes or taxes should be calculated

<figure><img src="https://2174323930-files.gitbook.io/~/files/v0/b/gitbook-x-prod.appspot.com/o/spaces%2F-MkrAx-51uwuvDxM_Z3r%2Fuploads%2Fh6P9UtgnPPSRkmFC5CBP%2Fimage.png?alt=media&amp;token=9dbadc1a-2df2-4034-92fd-de399bf1a027" alt=""><figcaption></figcaption></figure>

### Stock

**Stock Deduction**

Allow the stock to be deducted. This overrides individual stock deduction parameters. Setting this OFF will stop inventory tracking globally.

#### Account

**Customer Group**

You can select the customer group from the dropdown menu. For complete documentation on Customer Management, click here.

### Reviews

**Allow Reviews**

Enable or disable new customer review entries and display reviews on the storefront.

**Approve Reviews**

Approve new review entries automatically or manually.

<figure><img src="https://2174323930-files.gitbook.io/~/files/v0/b/gitbook-x-prod.appspot.com/o/spaces%2F-MkrAx-51uwuvDxM_Z3r%2Fuploads%2FuaRbTXSA61cFfNAV9DqQ%2Fimage.png?alt=media&amp;token=c88daf73-219f-4a37-a407-c88f90879b86" alt=""><figcaption></figcaption></figure>

### Terms & Conditions

**Checkout Terms**

Require customers to agree to terms before checkout. You can set the page from the dropdown menu.

**Registration Terms**

Require customers to agree to terms before an account is registered. You can set the page from the dropdown menu.

**Create/Edit pages**

You can create a new page by clicking on the “gear” icon from the right top menu and clicking on “Pages”.

<figure><img src="https://2174323930-files.gitbook.io/~/files/v0/b/gitbook-x-prod.appspot.com/o/spaces%2F-MkrAx-51uwuvDxM_Z3r%2Fuploads%2FF8Bi7eaKeNe7FGtzfJhM%2Fimage.png?alt=media&amp;token=80658a3b-947b-4764-8380-18bb7ce7248e" alt=""><figcaption></figcaption></figure>

You can click on <mark style="background-color:blue;">**+New**</mark> to create a new page.

Update the general tab fields.

<figure><img src="https://2174323930-files.gitbook.io/~/files/v0/b/gitbook-x-prod.appspot.com/o/spaces%2F-MkrAx-51uwuvDxM_Z3r%2Fuploads%2F7lK15G0UpAhAXzSaDpOC%2Fimage.png?alt=media&amp;token=99587d3d-fd01-41c7-965b-ff09597cd5ec" alt=""><figcaption></figcaption></figure>

<table><thead><tr><th width="218"></th><th></th></tr></thead><tbody><tr><td>Title</td><td>Title of the Page</td></tr><tr><td>Heading</td><td>Main Heading of the Page</td></tr><tr><td>Layout</td><td>Select from the dropdown among home, menu, checkout, account, reservation, page, local, or none</td></tr><tr><td>Permalink Slug</td><td>Use ONLY alpha-numeric lowercase characters, underscores or dashes, and make sure it is unique globally. e.g. https:myrestaurant.cloud.foodbucket.io/about-us</td></tr><tr><td>Navigation</td><td>Select where you would want this page link to be located. i.e. header, sidebar, footer, none.</td></tr><tr><td>Meta Description</td><td>Concise summaries of web pages for SEO</td></tr><tr><td>Meta Keywords</td><td>Appear in the HTML code of a Web page</td></tr><tr><td>Status</td><td>Enabled or disabled</td></tr></tbody></table>

### Order

You can click on Settings > Order tab.

### Invoicing

You can set the invoice prefix and generate the invoice from here. For complete documentation, please click here.

<figure><img src="https://2174323930-files.gitbook.io/~/files/v0/b/gitbook-x-prod.appspot.com/o/spaces%2F-MkrAx-51uwuvDxM_Z3r%2Fuploads%2FlEoTHvr4NDV6SceiO6Ra%2Fimage.png?alt=media&amp;token=e68228db-fd57-4ac2-a956-79f6e2c459bc" alt=""><figcaption></figcaption></figure>

### Check Out

<table><thead><tr><th width="246"></th><th></th></tr></thead><tbody><tr><td>Default Order Status</td><td>Select the default order status when a new order is placed/received.</td></tr><tr><td>Processing Order Status</td><td>Select the order status. An order must reach before the order starts stock reduction and coupon redemption.</td></tr><tr><td>Served/Prepared/Delivered Order Status</td><td> This order status is used to highlight the order state depending on its type, dine = served, takeaway &#x26; delivery = delivered.</td></tr><tr><td>Payment Order Status</td><td>elect the order status when an order is awaiting payment clearance before it can be marked as completed or served depending on its type.</td></tr><tr><td>Completed Order Status</td><td>Select the order status to mark an order as ‘completed’ before the order invoice is created and a customer can leave a review.</td></tr><tr><td>Cancellation Order Status</td><td> Select the order status when an order is marked as canceled or suspected of fraudulent activity.</td></tr><tr><td>Delivery Time</td><td>Set the number of minutes an order will take to be delivered after being placed.</td></tr><tr><td>Take Away Time</td><td>Set the number of minutes an order will take to be ready for takeaway after being placed.</td></tr><tr><td>Allow Guest Order</td><td>Allow customers to place an order without creating an account.</td></tr><tr><td>Require Location To Order</td><td>Set whether a customer MUST enter their postcode/address before they can place an order. If disabled, the customer will be allowed to order without entering their postcode/address but still require their delivery address to be covered.</td></tr><tr><td>Accept Future Orders</td><td>Allow customers to place orders for later when the restaurant is closed for delivery or takeaway during opening hours. This setting affects all locations.</td></tr></tbody></table>

### Split Payments

You can have the following options for Split Payments:

* **Accept Split Payments**: Allow customers to pay in split payments.
* **Allow Split Payments for Take Away**: Allow customers to pay in split payments.
* **Print Split Tickets Automatically**: You can enable or disable the automatic printing of split tickets.

<figure><img src="https://2174323930-files.gitbook.io/~/files/v0/b/gitbook-x-prod.appspot.com/o/spaces%2F-MkrAx-51uwuvDxM_Z3r%2Fuploads%2FFT0pJaWBIgH4JcpiTnwg%2Fimage.png?alt=media&amp;token=3fde1d5f-0994-4a85-9ee7-9a186c609a05" alt=""><figcaption></figcaption></figure>

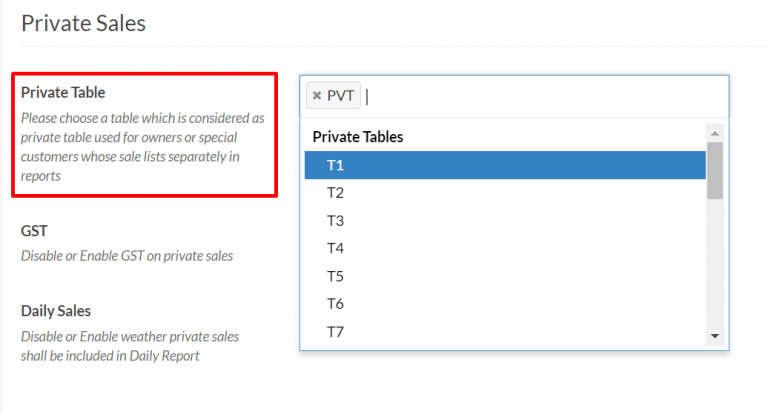
### Private Sales

Private sales are carried on private tables where the bill is not charged. You can change the status of a table to a private table from the backend/admin area.

<figure><img src="https://2174323930-files.gitbook.io/~/files/v0/b/gitbook-x-prod.appspot.com/o/spaces%2F-MkrAx-51uwuvDxM_Z3r%2Fuploads%2FMkZ0A5qlAHNiNqchbAkK%2Fimage.png?alt=media&amp;token=4fe75f53-956a-4cc8-9d1a-60c820fa9f77" alt=""><figcaption></figcaption></figure>

### Receipt

FoodBucket has very easy, to-the-point, receipt settings. We allow you to customize your Receipt Logo, Address, and Phone number, show NTN or TAX ID, and a customizable message that is displayed at the bottom of the receipt for promotions and offers. To read the complete documentation of receipt, please click here.

### Reservation

* **Reservation Mode:** Enable or disable table reservations in the storefront.
* **Default Reservation Status:** Select the default reservation status when a new reservation is received.
* **Confirmed Reservation Status:** Select the reservation status to mark a reservation as confirmed before the table is reserved.
* **Canceled Reservation Status:** Select the reservation status when a reservation is marked as canceled or suspected of fraudulent activity.
* **Reservation Time Interval:** Set the number of minutes between each reservation time.
* **Reservations Stay Time:** Set in minutes the average time a guest will stay at a table.

<figure><img src="https://2174323930-files.gitbook.io/~/files/v0/b/gitbook-x-prod.appspot.com/o/spaces%2F-MkrAx-51uwuvDxM_Z3r%2Fuploads%2FPq7ARmfPRZlovFomdBHa%2Fimage.png?alt=media&amp;token=30c409e3-fbee-43b7-ae84-751100174ae7" alt=""><figcaption></figcaption></figure>

### Image Manager

* **Maximum File Size:** The maximum size (in kilobytes) limit for files when uploading.
* **Thumbnail Dimension (Width x Height):** Uploads Enable or disable file uploading.
* **New Folder:** Enable or disable folder creation.
* **Copy:** Enable or disable file/folder copy.
* **Move:** Enable or disable moving files/folders.
* **Rename:** Enable or disable file/folder rename.
* **Delete:** Enable or disable deleting files/folders.
* **Transliteration:** Enable or disable the conversion of all unwanted characters.
* **Remember Last Folder:** How long to save the last opened folder in the cookie?
* **Thumbs:** This will delete all created thumbs. Note thumbs are automatically created.

<figure><img src="https://2174323930-files.gitbook.io/~/files/v0/b/gitbook-x-prod.appspot.com/o/spaces%2F-MkrAx-51uwuvDxM_Z3r%2Fuploads%2FSkuap9r1kuEYtALszmIc%2Fimage.png?alt=media&amp;token=f1611d78-95e6-4011-a398-519a8dce8812" alt="" width="563"><figcaption></figcaption></figure>

### Mail

From the mail tab of settings you can set the followings:

* **Registration Email:** Send a confirmation mail to the customer and/or admin email after successful account registration.
* **Order Confirmation/Alert Email:** Send a confirmation mail to the customer, admin, and/or location email after a new order has been created.
* **Reservation Confirmation/Alert Email:** Send a confirmation mail to the customer, admin, and/or location email when a new reservation is received.
* **Mail Protocol:** You can select MAIL, SENDMAIL, and SMTP.
* **Test Email:** You can send a test email by clicking on the “Sent Test Email” button.

<figure><img src="https://2174323930-files.gitbook.io/~/files/v0/b/gitbook-x-prod.appspot.com/o/spaces%2F-MkrAx-51uwuvDxM_Z3r%2Fuploads%2FSU8xAyDPqeabASivh6kU%2Fimage.png?alt=media&amp;token=fead3b0d-84e2-4a5a-bd49-eeecae0331ac" alt=""><figcaption></figcaption></figure>

### Custom Sales Head

You can enable a custom sales head from the Custom Sales Head tab of Settings.

<figure><img src="https://2174323930-files.gitbook.io/~/files/v0/b/gitbook-x-prod.appspot.com/o/spaces%2F-MkrAx-51uwuvDxM_Z3r%2Fuploads%2F3Q6hXTd12f622dJrZ8Xt%2Fimage.png?alt=media&amp;token=010eea8e-98dc-40f6-9e50-e1942849a58c" alt=""><figcaption></figcaption></figure>

* **Status:** Enable or disable this sales head’s calculation.
* **Title:** Enter a title for this sales head.
* **Calculated On:** Choose how this sales head should be calculated.
* **Percentage:** Calculate the percentage.

### Payment Methods

You can add the payment methods from the **“Payment Methods”** tab of Settings.

* **Add New Payment Methods**: You can add a new payment method by clicking on the **“+”** icon.
* A new dialog box will open, Add the name of the Payment Method, and write the description.
* Select the type from the dropdown menu either Direct or Third Party Service.
* You can assign the tax to the payment method by dropdown of tax type.

<figure><img src="https://2174323930-files.gitbook.io/~/files/v0/b/gitbook-x-prod.appspot.com/o/spaces%2F-MkrAx-51uwuvDxM_Z3r%2Fuploads%2FbIjf311UhageMd03X7HJ%2Fimage.png?alt=media&amp;token=63d22d01-0830-49a6-a7dc-f5532fb61941" alt=""><figcaption></figcaption></figure>

### Tax Types

You can add multiple tax types from here. Click on **+** to add a new tax type. A new dialog box will open as shown in the image below.

<figure><img src="https://2174323930-files.gitbook.io/~/files/v0/b/gitbook-x-prod.appspot.com/o/spaces%2F-MkrAx-51uwuvDxM_Z3r%2Fuploads%2FrWazaCt6odBKkHSlMVdN%2Fimage.png?alt=media&amp;token=cbdc0851-dbf7-46e5-8f3b-54a0c81e4876" alt=""><figcaption></figcaption></figure>

* Add the tax type name, description, and percentage to the charge. Then, click on the **“ADD”** button.
* You can also edit the tax type by clicking on the **“pen”** icon and deleting the tax by clicking on the **“Delete”** button.

<figure><img src="https://2174323930-files.gitbook.io/~/files/v0/b/gitbook-x-prod.appspot.com/o/spaces%2F-MkrAx-51uwuvDxM_Z3r%2Fuploads%2FWroHbJOLmcACwEw4Ydfp%2Fimage.png?alt=media&amp;token=eb983f72-e292-4730-bf0d-6915400bd121" alt=""><figcaption></figcaption></figure>


# Branding & Logo

FoodBucket gives you the ability to fully customize and rebrand your POS and website to increase your brand awareness and visibility.

### Receipt Settings

FoodBucket has very easy, to-the-point, receipt settings. We allow you to customize your Receipt Logo, Address, and Phone number, Show NTN or TAX ID, and a customizable message that is displayed at the bottom of the receipt for promotions and offers.&#x20;

<figure><img src="https://2174323930-files.gitbook.io/~/files/v0/b/gitbook-x-prod.appspot.com/o/spaces%2F-MkrAx-51uwuvDxM_Z3r%2Fuploads%2FtlysIpVhVeyRvrS9pSi1%2Fimage.png?alt=media&amp;token=d2bcb7c7-9bf8-4b25-94ef-6a1710af9967" alt="" width="563"><figcaption></figcaption></figure>

To access the Receipt Settings, follow the steps below:

1. Go to **System > Settings**
2. Click on the **Receipt** Tab
3. Receipt settings will appear.

<figure><img src="https://2174323930-files.gitbook.io/~/files/v0/b/gitbook-x-prod.appspot.com/o/spaces%2F-MkrAx-51uwuvDxM_Z3r%2Fuploads%2FKYugzqSdc3x344lqIzzR%2Fimage.png?alt=media&amp;token=9fb69904-5a1f-43d7-af66-861c752d68cf" alt="" width="563"><figcaption></figcaption></figure>

#### Receipt Logo

The receipt logo is shown at the top of the receipt. Click on the Select button, a modal box will appear.

1. Upload Image
2. Once uploaded, Select your image
3. Click on **Save** and the Modal box will close
4. Click on **Save** again found on the Top Left

#### Payment Status

The payment status on the receipt is a very handy feature to allow your customers to know whether they are getting a print receipt or a final invoiced receipt. This also helps stops any kind of theft.

By default, payment status is always “Unpaid”. Once final order details are updated, after receiving the cash or payment. Its status is permanently changed to “Paid” and all receipts that are printed after will have a “Paid” badge right on top.

You can opt to show or hide the payment status on the receipt by following the steps given below:

1. Go to Receipt Settings
2. Change the Payment Status <mark style="color:green;">**Enabled**</mark> to show payment status or <mark style="color:red;">**Disabled**</mark> to hide

#### Receipt Text/Custom Message

If you wish to display a custom message on your receipt. Follow the steps below:

1. Go to **Receipt Settings**
2. Change the **Receipt Text** as per your requirement

Note: Do not forget to update POS settings >Sync & Refresh to reflect the receipt Changes

#### Receipt Address

To change the receipt address, you will have to change the restaurant location details. Follow the steps below to access it:

1. Log in to **Admin Area/Back office**
2. From Left Menu > **Goto Restaurant > Locations**
3. Click on the pencil icon to edit the restaurant location details&#x20;

<figure><img src="https://2174323930-files.gitbook.io/~/files/v0/b/gitbook-x-prod.appspot.com/o/spaces%2F-MkrAx-51uwuvDxM_Z3r%2Fuploads%2FaLt4utQLgjeqR4W1zwRf%2Fimage.png?alt=media&amp;token=f7a5ec32-1b54-4356-8fa8-bfa1a8f7c80d" alt=""><figcaption></figcaption></figure>

* **Name:** Displayed name on the receipt
* **Telephones 1 & 2**: Phone numbers displayed on the receipt, leave them blank to hide.
* **Address 1 & 2:** Address lines that are displayed on the receipt e.g. Building # Street & Branch Name.

<figure><img src="https://2174323930-files.gitbook.io/~/files/v0/b/gitbook-x-prod.appspot.com/o/spaces%2F-MkrAx-51uwuvDxM_Z3r%2Fuploads%2FbTFIpr5lV6TSkNio5yYs%2Fimage.png?alt=media&amp;token=fc65a0bb-d606-469a-b195-5fe2356599f5" alt=""><figcaption></figcaption></figure>

### Customer Display&#x20;

You can customize your customer-facing display to show your offers or a branding logo. You can upload an image or a video (Beta). To change the settings, follow the instructions given below:

1. Log in to **Admin Area/Back Office**
2. From the Left Menu, Click **System > Settings >** Scroll down to Customer Facing Display
3. Click on **Select** > Modal Box > Upload Image
4. Select the Image and click on **“Choose”** to close the modal box
5. Click on the **Save** button on the top left to save changes

<figure><img src="https://2174323930-files.gitbook.io/~/files/v0/b/gitbook-x-prod.appspot.com/o/spaces%2F-MkrAx-51uwuvDxM_Z3r%2Fuploads%2FcpXc12CTfc9m2eUUyQfD%2Fimage.png?alt=media&amp;token=1c89dce4-2965-4a60-8127-389ec01c4746" alt=""><figcaption></figcaption></figure>


# Menu Management

## Overview

&#x20;FoodBucket offers complete control of the menu. You can add categories, menu items, options, etc. What makes us unique is we give you the ability to interlink menus and you can create unlimited levels or depths of any menu. No matter how complex or how detailed the menu customization you need, our system handles it pretty well and allows your managers to punch an accurate order, swiftly and clearly.

We have designed this menu not only to serve restaurants that offer pretty basic meals but also for those who want to offer their customers to decide on each and every item. From Mcdonald's to Subway, we can handle them both.

Before we start, here is a quick display of our POS Screen that allows you to understand our menu basics.

<figure><img src="https://2174323930-files.gitbook.io/~/files/v0/b/gitbook-x-prod.appspot.com/o/spaces%2F-MkrAx-51uwuvDxM_Z3r%2Fuploads%2FMc5CDY0zLrX2OajNl5S0%2Fimage.png?alt=media&amp;token=72267932-a823-4808-9c38-0881417ed005" alt=""><figcaption></figcaption></figure>

1. **Menu Category** e.g. Pizzas, Desserts, Drinks
2. **Menu Items** e.g. Italian Pizza, Mozzarella, Chocolate Cake
3. **Menu Options** e.g. Small Pizza, Hand Tossed

### **Basic POS Workflow**&#x20;

Menu Category > Menu Items > Menu Item Options > Add to bucket

### Add a new Menu Category

1. Click on the Kitchen > Category from the left panel

<figure><img src="https://2174323930-files.gitbook.io/~/files/v0/b/gitbook-x-prod.appspot.com/o/spaces%2F-MkrAx-51uwuvDxM_Z3r%2Fuploads%2FR0383wlCgO0EcFZvCPwt%2Fimage.png?alt=media&amp;token=e2c09ec7-e9cf-40fd-8d10-035411c33a55" alt=""><figcaption></figcaption></figure>

1. Then, click on the “<mark style="background-color:blue;">**+ NEW”**</mark> button, and the following form will open

<figure><img src="https://2174323930-files.gitbook.io/~/files/v0/b/gitbook-x-prod.appspot.com/o/spaces%2F-MkrAx-51uwuvDxM_Z3r%2Fuploads%2FjtzGKYCEtBI8a68wJnUk%2Fimage.png?alt=media&amp;token=1ef50b9a-a26c-4d02-b86b-a9ca5a6b2bd7" alt=""><figcaption></figcaption></figure>

* **Name:** Add the name of the category. Category segregates and sorts the whole menu into different parts to organize the menu.
* **Permalink Slug:** Add permalink slug. Permalink Slug is a URL used for displaying the category on the website/your restaurant’s front store.
* **Parent Category:** Assign Parent Category if any. You can also create a child category and assign a parent category to it. The sub-category (child) is the division of the main category (parent).
* **Description & Image:** Update the description and upload an image. You can add tempting details in the description about your category and a mouthwatering picture.
* **Priority & Status:** Set priority and enable the status of the category. Priority is the order ranking of the category. By enabling the status of the category, it will be displayed in the POS.

3. Fill out the form and click on the <mark style="background-color:blue;">**save**</mark> button.

<figure><img src="https://2174323930-files.gitbook.io/~/files/v0/b/gitbook-x-prod.appspot.com/o/spaces%2F-MkrAx-51uwuvDxM_Z3r%2Fuploads%2FG22o8UTGQ6LGqg8YCYYF%2Fimage.png?alt=media&amp;token=9ae66128-2389-4d86-8a18-ca088c9a8657" alt=""><figcaption></figcaption></figure>

### Editing a category

1. Click on the Kitchen > Category from the left panel and click on **‘Pen Icon’** to edit as shown in the image below:

<figure><img src="https://2174323930-files.gitbook.io/~/files/v0/b/gitbook-x-prod.appspot.com/o/spaces%2F-MkrAx-51uwuvDxM_Z3r%2Fuploads%2FFEP6Nlciq59VZzslDM8a%2Fimage.png?alt=media&amp;token=f4d90b01-f162-49ed-bf24-64bfe4f3392f" alt=""><figcaption></figcaption></figure>

1. Update the category fields as per your requirements.
2. Click on the **Save** button.

### Add a new Menu Item

1. Click on the Kitchen > Menu from the left panel.

<figure><img src="https://2174323930-files.gitbook.io/~/files/v0/b/gitbook-x-prod.appspot.com/o/spaces%2F-MkrAx-51uwuvDxM_Z3r%2Fuploads%2Fg2Rgoj3MvjSVCoqcVie5%2Fimage.png?alt=media&amp;token=78deb338-41c7-4b59-815f-19806dbe2ef4" alt=""><figcaption></figcaption></figure>

1. Then, click on the“<mark style="background-color:blue;">**+ NEW”**</mark> button, and the following menu form will open:

<figure><img src="https://2174323930-files.gitbook.io/~/files/v0/b/gitbook-x-prod.appspot.com/o/spaces%2F-MkrAx-51uwuvDxM_Z3r%2Fuploads%2FSUs9CTPh1msh4k4FDIbK%2Fimage.png?alt=media&amp;token=0eb6efaa-0dd1-4596-a11f-223a28b54a99" alt=""><figcaption></figcaption></figure>

* **Name:** Add the name of the menu item. The name of the menu item is the name of the dish generally.
* **Description:** Update description. You can add tempting details in the description of your menu.
* **Type:** Select the type of the menu from the drop-down menu. Drop down menu has options for Quantity, Weight, and Variable. You decide what type you want to charge for your menu, either as a quantity, weight in grams, kilograms, or variable according to your set attributes.
* **Price:** Add the price you want to charge for your menu item.
* **Category:** Assign a category to your menu item. It will help in organizing the menu and the items will be shown under the assigned category.
* **Image:** Upload a mouthwatering image of the menu item.

You have the following fields to update from the **“Details”** tab.

## Menu Details

<figure><img src="https://2174323930-files.gitbook.io/~/files/v0/b/gitbook-x-prod.appspot.com/o/spaces%2F-MkrAx-51uwuvDxM_Z3r%2Fuploads%2FPSGKgLjBBNpeH5O9rROg%2Fimage.png?alt=media&amp;token=c7d15240-cfba-46ee-a520-7acef525effe" alt=""><figcaption></figcaption></figure>

### Mealtime

Set the mealtime of a day when your customers can order a particular menu item. Mealtimes can be managed under Localization > Mealtimes

### Stock Quantity

Add stock quantity. For unlimited stock, set it to 0.

### Minimum Quantity

The default minimum quantity that can be ordered is set to 1, you can set it as required.

### Subtract Stock

Enable subtracting stock if you want to manage inventory with POS operations. By enabling it, once the order is placed, all the ingredients according to the recipe will be subtracted from the inventory/stock.

### Mark as Featured

Mark an item as featured. Featured items are shown in a slider in mobile applications.

### Show on Main Menu

This option is used for items available in deals or meals only. If you want a menu item to be offered only in a deal or meal and is not an individual menu item, then you simply disable this option.

### Priority & Status

Set priority and enable the status of the menu. Priority is the order of the menu. By enabling the status of the menu, it will be displayed in the POS under the assigned category.

### Menu Options

You have the following fields to update from the “Menu Options” tab.

You may add options to your menu item. Options are the choices made by the customer. For instance, soft drink is the menu item and Pepsi, 7up, Marinda, etc. are the options.

<figure><img src="https://2174323930-files.gitbook.io/~/files/v0/b/gitbook-x-prod.appspot.com/o/spaces%2F-MkrAx-51uwuvDxM_Z3r%2Fuploads%2Fl7m46cWkJUPuTNtMrRnA%2Fimage.png?alt=media&amp;token=92a4482d-c1f1-4401-81ca-53bc845bf9c6" alt=""><figcaption></figcaption></figure>

#### Add Menu Option

You can select a menu option from the search bar by typing the name or you can also add a new menu option from the Add New Menu Options button.

<figure><img src="https://2174323930-files.gitbook.io/~/files/v0/b/gitbook-x-prod.appspot.com/o/spaces%2F-MkrAx-51uwuvDxM_Z3r%2Fuploads%2Ffcj0hzDaRSKO9M8606yg%2Fimage.png?alt=media&amp;token=e06823df-635d-40e1-8984-1c7a09628808" alt=""><figcaption></figcaption></figure>

A new screen will appear showing you the fields of the option.

<figure><img src="https://2174323930-files.gitbook.io/~/files/v0/b/gitbook-x-prod.appspot.com/o/spaces%2F-MkrAx-51uwuvDxM_Z3r%2Fuploads%2FA28geVl8DiaWEP0zANIi%2Fimage.png?alt=media&amp;token=2c170b0b-2b3b-41e3-813b-3f81f162f071" alt="" width="563"><figcaption></figcaption></figure>

**Option Name**

Add the name of the option.

**Display Type**

You can select display type from the dropdown menu. It has 3 options i.e. Radio, Checkbox and Select.

* Radio: It enables you to select only one option from the given range.
* Select: It enables you to select one or none.
* Checkbox: It enables you to select one or more.

**Menu Option Values**

Next, you have to add **Option Values** according to the price. This will help you set a custom price when creating more customizable options.

<figure><img src="https://2174323930-files.gitbook.io/~/files/v0/b/gitbook-x-prod.appspot.com/o/spaces%2F-MkrAx-51uwuvDxM_Z3r%2Fuploads%2F2PohUqVkxSNj4hZrf8G2%2Fimage.png?alt=media&amp;token=2e61a784-044f-4b03-97d2-93c918bc2320" alt=""><figcaption></figcaption></figure>

Click on the **Save Button** to save the Menu Option.

<figure><img src="https://2174323930-files.gitbook.io/~/files/v0/b/gitbook-x-prod.appspot.com/o/spaces%2F-MkrAx-51uwuvDxM_Z3r%2Fuploads%2FwtJCf8NrmYUUJwPUrRYW%2Fimage.png?alt=media&amp;token=52506e52-30eb-48c3-a31c-8c8aa7c5dfa2" alt=""><figcaption></figcaption></figure>

You can also add a menu option from the left panel **Kitchen > Options**, and click on the **“+ New”** Button

<figure><img src="https://2174323930-files.gitbook.io/~/files/v0/b/gitbook-x-prod.appspot.com/o/spaces%2F-MkrAx-51uwuvDxM_Z3r%2Fuploads%2FyWc9samJ3sCfrsD6nhuu%2Fimage.png?alt=media&amp;token=a8772b87-28a4-4964-b8e1-827c473f0c3e" alt=""><figcaption></figcaption></figure>

### Menu Meal

You have the following fields to update from the **Meal** tab in the Menu.

You can add menu items that you want to include in making a meal. You can simply search from the search bar to add the menu item or you can also add a new menu item from the **Add New Menu Item** button.

The name will appear in the name field. However, you can override the original price by enabling the button and adding the item price manually. Status should be enabled to show it in the POS.

<figure><img src="https://2174323930-files.gitbook.io/~/files/v0/b/gitbook-x-prod.appspot.com/o/spaces%2F-MkrAx-51uwuvDxM_Z3r%2Fuploads%2FmiX2K1Yl4PqyypJC5eB1%2Fimage.png?alt=media&amp;token=d440d020-bce1-4b6f-9eed-e4afaa310c27" alt=""><figcaption></figcaption></figure>

#### Served as Deal

By enabling served as a deal, items added to the meal will automatically be punched in a deal.

### Menu Specials

You have the following fields to update from the **“Specials”** tab.

You can offer a special price for the menu for a specified date range. However, you can also set the same feature using **discount systems**.

<figure><img src="https://2174323930-files.gitbook.io/~/files/v0/b/gitbook-x-prod.appspot.com/o/spaces%2F-MkrAx-51uwuvDxM_Z3r%2Fuploads%2FVYmMgUWiBOYDzCsBXwAB%2Fimage.png?alt=media&amp;token=24fc2c9c-469b-4e3b-b0d2-ab142d40cd25" alt=""><figcaption></figcaption></figure>

#### Special

By enabling the button, your menu item will be considered special.

#### Start Date

Set the beginning of the time (date) from where the special price will be implemented.

#### End Date

Set the end of the time (date) from where the special price will be back to the original price.

#### Special Price

Set the discounted or special price that you want to offer.

After filling all the required fields, click on the **Save Button**

<figure><img src="https://2174323930-files.gitbook.io/~/files/v0/b/gitbook-x-prod.appspot.com/o/spaces%2F-MkrAx-51uwuvDxM_Z3r%2Fuploads%2FDAGaDNws2wAUlF17RqA9%2Fimage.png?alt=media&amp;token=329bda63-0496-4277-b7b0-27fcc3a7a6c6" alt=""><figcaption></figcaption></figure>

## Variable Menu Pricing

In case you want to change the menu pricing depending on options, sizes, or weight. You can add variable prices by selecting the **Variable** from the type **dropdown menu**. As shown below:

<figure><img src="https://2174323930-files.gitbook.io/~/files/v0/b/gitbook-x-prod.appspot.com/o/spaces%2F-MkrAx-51uwuvDxM_Z3r%2Fuploads%2F1eHnimGQQRibXp1VU1Zr%2Fimage.png?alt=media&amp;token=1c3b37f4-0d4c-4a8c-a190-185a1ad254d9" alt=""><figcaption></figcaption></figure>

A new tab will appear next to the special. You can add a name according to the variable field that you want your price to be charged. For instance, a restaurant is charging 3 different prices for 3 different sizes of pizza. The variable names will be small, medium, and large with respective prices as shown in the image above.

<figure><img src="https://2174323930-files.gitbook.io/~/files/v0/b/gitbook-x-prod.appspot.com/o/spaces%2F-MkrAx-51uwuvDxM_Z3r%2Fuploads%2FORI0UrPqGCeWf32osjOV%2Fimage.png?alt=media&amp;token=b2f98ade-0d6b-414e-b252-5ef43ec8baea" alt=""><figcaption></figcaption></figure>


# Recipe Management

## Overview

FoodBucket Recipe Management facilitates consumption analysis of the ingredients, synced with inventory management. You can have a fully featured recipe manager that manages the complex relationships and processes related to the restaurant’s production recipes, giving you the option to add or remove ingredients. You can standardize all your recipes by creating recipes and attaching ingredients to items.

Moreover, your recipes are synced with built-in inventory management that automatically syncs and updates your inventory as dishes and drinks are sold. You can keep your food costs in check by reducing undue wastage. Hence, you can keep track of your stock and identify low-turn stock.

### Ingredients

You can add, edit and remove any ingredient by clicking on **Recipe > Ingredients** from the left panel.

<figure><img src="https://2174323930-files.gitbook.io/~/files/v0/b/gitbook-x-prod.appspot.com/o/spaces%2F-MkrAx-51uwuvDxM_Z3r%2Fuploads%2FxqAdpKtnpY9dGTbWpJa3%2Fimage.png?alt=media&amp;token=acfd9229-4481-4fbd-96f1-6678d75ef00c" alt=""><figcaption></figcaption></figure>

#### Add an Ingredient

You can add the ingredients by clicking on **Recipes > Ingredients** from the left panel.

1. Click on the **“+ New” Button**, and fill in the details.

<figure><img src="https://2174323930-files.gitbook.io/~/files/v0/b/gitbook-x-prod.appspot.com/o/spaces%2F-MkrAx-51uwuvDxM_Z3r%2Fuploads%2FiRrXrYhW6zI4jWg0uJPI%2Fimage.png?alt=media&amp;token=1e210134-575b-4e08-9726-222ce5cb05e5" alt=""><figcaption></figcaption></figure>

* **Name:** Add the name of the ingredient.
* **Unit**: Select the unit type from the dropdown menu. (weight in grams, Quantity Count, and volume in liters

<figure><img src="https://2174323930-files.gitbook.io/~/files/v0/b/gitbook-x-prod.appspot.com/o/spaces%2F-MkrAx-51uwuvDxM_Z3r%2Fuploads%2FRVezD3Ecb5oqKciKcBUr%2Fimage.png?alt=media&amp;token=13564307-9add-477b-99e9-23b2fff80582" alt=""><figcaption></figcaption></figure>

* **Threshold**: The minimum count of an item you keep on hand.
* **Description:** Add a brief description of your ingredient.
* **Priority:** It is the order ranking of the ingredient.
* **Status:** Enable the status to be active.

1. After filling in the fields, click on the **“Save” Button.**

<figure><img src="https://2174323930-files.gitbook.io/~/files/v0/b/gitbook-x-prod.appspot.com/o/spaces%2F-MkrAx-51uwuvDxM_Z3r%2Fuploads%2FTv9sUkbdDJkC1X69hTwn%2Fimage.png?alt=media&amp;token=db11782e-4214-48fa-9a60-fc7d007e7809" alt=""><figcaption></figcaption></figure>

#### Edit an Ingredient

1. Click on the **Recipe > Ingredien**t from the left panel and click on **‘Pen Icon’** to edit as shown in the image below:

<figure><img src="https://2174323930-files.gitbook.io/~/files/v0/b/gitbook-x-prod.appspot.com/o/spaces%2F-MkrAx-51uwuvDxM_Z3r%2Fuploads%2FBRsbI2vdebqzBPW6s0Qw%2Fimage.png?alt=media&amp;token=a5b13756-730b-4d6e-a79d-c1c47f67db22" alt=""><figcaption></figcaption></figure>

1. Update the ingredient fields as per your requirements.
2. Click on the **Save Button.**

#### Delete an Ingredient

1. To delete an **ingredient**, click on the **Recipe > Ingredient** from the left panel.

   <figure><img src="https://2174323930-files.gitbook.io/~/files/v0/b/gitbook-x-prod.appspot.com/o/spaces%2F-MkrAx-51uwuvDxM_Z3r%2Fuploads%2FcUIKHAu7ajvSeD5H4FXc%2Fimage.png?alt=media&amp;token=ef1e9aed-7dc7-4337-a8b5-0ecad85a9df2" alt=""><figcaption></figcaption></figure>
2. Select the ingredient through a check box from the list that you want to delete as shown in the image above.
3. Click on the **“Delete”** Button.

### Recipes

You can add, edit and delete recipes from **Recipes > Recipes** from the left panel.

* Add a Recipe
* Edit a Recipe
* Delete a Recipe

### Options Recipes

You can add, edit and remove options recipes by clicking on Recipes > Options Recipe from the left panel.

#### Add an Options Recipes

You can add the options recipes by clicking on **Recipes > Options** Recipes from the left panel.

<figure><img src="https://2174323930-files.gitbook.io/~/files/v0/b/gitbook-x-prod.appspot.com/o/spaces%2F-MkrAx-51uwuvDxM_Z3r%2Fuploads%2Fpxz8oTlJaenXrUeTTcvg%2Fimage.png?alt=media&amp;token=7a92f25b-df7b-4f97-afa8-705be00dd38f" alt=""><figcaption></figcaption></figure>

1. Click on the **“+ New” Button** to add the new Options Recipe, and fill in the details.


# Inventory Management

## Overview

I**nventory Management System** is also one of our key features which provides you the most efficient way to manage and control your stock. Proper stock inventory management keeps service running smoothly, but failure to do so can impact financials. One small stock management error can lead to food shortages and unnecessary food waste.

The **FoodBucket** Inventory management system allows you to know the cost of everything that comes out of your kitchen. Detailed usage, loss, and sales performance reports tell you what’s sitting on the shelves and where you’re losing money. You can also easily manage your Vendors/Suppliers, Purchase Orders, and their receiving notes along with every transaction to keep them in your record.

<figure><img src="https://2174323930-files.gitbook.io/~/files/v0/b/gitbook-x-prod.appspot.com/o/spaces%2F-MkrAx-51uwuvDxM_Z3r%2Fuploads%2Fr0RmehgH3KSPcZTjlXF9%2Fimage.png?alt=media&amp;token=0eeb1b00-8192-49db-8203-328e5fa5f527" alt=""><figcaption></figcaption></figure>

### Location

1. Login to your Admin Panel/Backend Area.
2. Go to Inventory > Report for inventory report.
3. Go to Inventory > Purchase Orders for purchase orders.
4. Go to Inventory > Vendors/Suppliers for vendors/suppliers.
5. Go to Inventory > StockTake Report for the stocktake report.

You can check the inventory details and graphs here:

1. Click on the **“Inventory”** button in the side menu.

   <figure><img src="https://2174323930-files.gitbook.io/~/files/v0/b/gitbook-x-prod.appspot.com/o/spaces%2F-MkrAx-51uwuvDxM_Z3r%2Fuploads%2FGRgnaWVRFJ87rAXoMa77%2Fimage.png?alt=media&amp;token=07dcb108-f0e2-476b-af71-b2beba069c2f" alt=""><figcaption></figcaption></figure>
2. Click on the **“Vendors/Supplier”** button to get the details about your suppliers.&#x20;

   <figure><img src="https://2174323930-files.gitbook.io/~/files/v0/b/gitbook-x-prod.appspot.com/o/spaces%2F-MkrAx-51uwuvDxM_Z3r%2Fuploads%2F99fZeQMJzpSZ3rVV5B26%2Fimage.png?alt=media&amp;token=88c848b1-5c64-4d9d-a59b-9efba8a0e470" alt=""><figcaption></figcaption></figure>
3. You can also add a new vendor by clicking **“Add New Vendor”**

   <figure><img src="https://2174323930-files.gitbook.io/~/files/v0/b/gitbook-x-prod.appspot.com/o/spaces%2F-MkrAx-51uwuvDxM_Z3r%2Fuploads%2F2GSJIiMa4HbfCP5mB698%2Fimage.png?alt=media&amp;token=c78b19c3-b1fb-4023-8b6f-0272f6cec7ed" alt=""><figcaption></figcaption></figure>
4. Click on the “Purchase Order” under the “Inventory” tab to view the list of purchase orders.&#x20;

   <figure><img src="https://2174323930-files.gitbook.io/~/files/v0/b/gitbook-x-prod.appspot.com/o/spaces%2F-MkrAx-51uwuvDxM_Z3r%2Fuploads%2F3Arxxe7q2NGzmh9FKXoy%2Fimage.png?alt=media&amp;token=1442ebed-4997-4b47-aa4f-2abbc0bb9a9f" alt=""><figcaption></figcaption></figure>

   You can create a new purchase order by clicking on **“Create Purchase Order”**
5. Fill up the required information that appears in the popup.

   > **Vendors:** Choose the vendor to create PO. If it’s not available in the dropdown list then add the vendor first. Follow the previous step to add vendor.
   >
   > &#x20;**Description**: Add the details of the items here.
   >
   > &#x20;**Ingredients**: Choose the ingredients you purchase and mention the Quantity and Price
   >
   > **Add Ingredients:** For multiple items, you can click on “Add Ingredients” button.

<figure><img src="https://2174323930-files.gitbook.io/~/files/v0/b/gitbook-x-prod.appspot.com/o/spaces%2F-MkrAx-51uwuvDxM_Z3r%2Fuploads%2F0CDc5IOGecSWnC9PisXX%2Fimage.png?alt=media&amp;token=f59e8e6b-6c41-4596-84da-edd2581b1dfe" alt=""><figcaption></figcaption></figure>

5\. Click on the “Report” button to access the inventory report.

> **Download Excel:** Click this button to download the report in Excel format.
>
> &#x20;**Download PDF:** Click this button to download the report in PDF format.&#x20;
>
> **Stock Taking:** This button generates a report of inventory to tally the stock. The admin can also edit the stock on verifying.

<figure><img src="https://2174323930-files.gitbook.io/~/files/v0/b/gitbook-x-prod.appspot.com/o/spaces%2F-MkrAx-51uwuvDxM_Z3r%2Fuploads%2Fd9zKmjX3PxBBY5PQVq9A%2Fimage.png?alt=media&amp;token=d185c357-de97-460a-aef1-058783080f32" alt=""><figcaption></figcaption></figure>

6\. Click on the **“Stock Taking Report”** for taking the stock report. You can check the variance in the items and your inventory.

<figure><img src="https://2174323930-files.gitbook.io/~/files/v0/b/gitbook-x-prod.appspot.com/o/spaces%2F-MkrAx-51uwuvDxM_Z3r%2Fuploads%2Fc8MjSqhidQReG1tnuawr%2Fimage.png?alt=media&amp;token=afd35eaa-cc41-4530-9c0f-8d84da34e168" alt=""><figcaption></figcaption></figure>

Click on **“View Transaction”** to review the complete report.\
![](https://2174323930-files.gitbook.io/~/files/v0/b/gitbook-x-prod.appspot.com/o/spaces%2F-MkrAx-51uwuvDxM_Z3r%2Fuploads%2FY2WlrBeJ3DUSXAufLI93%2Fimage.png?alt=media\&token=5b611869-d3f2-4600-82fd-5345a0832039)


# Table Management

## Overview

Cable management allows you to easily manage and see all the operations running on your **POS** in a very smart and intelligent way.

### Table Manager

1. Login to your Admin Panel/Backend Area.
2. Go to **Restaurant > Tables** on the left menu.
3. Here you can **Add, Edit,** and **Delete** the tables of your restaurant.

#### Add New Table

1. Go to Table Manager.
2. Click on **"New"** located at the top left corner.
3. Fill up the following fields:
   * **Name** – your table name can be anything e.g. T1, T2, G1, G4, etc.
   * **Minimum** – minimum number of people to sit.
   * **Capacity** – maximum number of people to sit.
   * **Priority** – you can add the table priority e.g. T1 will be at 1 and T4 will be at 2.
   * **Status** – whether your table will be available on your POS or not.
4. Click on **"Save" or "Save & Close"** to add your table.

#### Edit & Delete the Existing Table

1. Edit:
   * Press on the pencil icon located on the very first column of the table row.
   * You will be redirected to the page where you can edit all the details listed above while adding the table.
2. Delete:
   * Check the boxes located at the very left side of the table.
   * It can be only one or multiple.
   * Click on the <mark style="color:red;">**"Delete"**</mark> located next to the **"New"** button.

### Private Sales

1. Enable private sales on a private table from System > Order > Private Sales.
2. Choose a table that is considered a private table used for owners or special customers whose sales are listed separately in reports.

<figure><img src="https://2174323930-files.gitbook.io/~/files/v0/b/gitbook-x-prod.appspot.com/o/spaces%2F-MkrAx-51uwuvDxM_Z3r%2Fuploads%2F9ehDDRWimeoEjh90tO3m%2Fimage.png?alt=media&amp;token=8f66a35e-8a78-475e-83be-9bdce59b8642" alt=""><figcaption></figcaption></figure>

#### GST:

You can disable or enable GST on private sales.

<figure><img src="https://2174323930-files.gitbook.io/~/files/v0/b/gitbook-x-prod.appspot.com/o/spaces%2F-MkrAx-51uwuvDxM_Z3r%2Fuploads%2Fhrze7OkXMEHj2xDAZucc%2Fimage.png?alt=media&amp;token=548854df-92d4-4d36-bf89-fe50250a332f" alt="" width="525"><figcaption></figcaption></figure>

### Daily Sales

Disable or Enable whether private sales shall be included in Daily Report.

<figure><img src="https://2174323930-files.gitbook.io/~/files/v0/b/gitbook-x-prod.appspot.com/o/spaces%2F-MkrAx-51uwuvDxM_Z3r%2Fuploads%2FNt3OFkE4JxmqnTlQWAlf%2Fimage.png?alt=media&amp;token=c10ea4ae-072d-4212-9c4a-15a46152e191" alt="" width="563"><figcaption></figcaption></figure>

<mark style="background-color:red;">**Note:**</mark> <mark style="background-color:red;"></mark><mark style="background-color:red;">Do not forget to update POS settings > Sync & Refresh to reflect the table changes.</mark>


# Customer Management

Our Customer Relations Manager allows you to maintain all record of your customers which can help you get in touch with your customers, review their history, and maintain a loyalty system.

### Manage Customers

You can manage your customer information from the **Users > Customers** from the left panel.

<figure><img src="https://2174323930-files.gitbook.io/~/files/v0/b/gitbook-x-prod.appspot.com/o/spaces%2F-MkrAx-51uwuvDxM_Z3r%2Fuploads%2F7AIQbj1ZiDTC5GisYlrg%2Fimage.png?alt=media&amp;token=103ec544-6a1a-4d1f-b9ad-ffbb7c1ef7f0" alt=""><figcaption></figcaption></figure>

For adding a new customer, click on the **“+ New”** button.

<figure><img src="https://2174323930-files.gitbook.io/~/files/v0/b/gitbook-x-prod.appspot.com/o/spaces%2F-MkrAx-51uwuvDxM_Z3r%2Fuploads%2FZ9L0esalq5yl0xHoFBNq%2Fimage.png?alt=media&amp;token=6cc7ae3b-c7a3-4b7a-b4f8-7e978e38eb72" alt=""><figcaption></figcaption></figure>

A form will appear as shown in the image below:

<figure><img src="https://2174323930-files.gitbook.io/~/files/v0/b/gitbook-x-prod.appspot.com/o/spaces%2F-MkrAx-51uwuvDxM_Z3r%2Fuploads%2F75DACT2BH3oCsXj1ouk5%2Fimage.png?alt=media&amp;token=82d94bab-c610-4d61-8a2c-e5b5c9ba14e1" alt=""><figcaption></figcaption></figure>

* **First Name:** Add the first name of the customer.
* **Last Name**: Add the last name of the customer.
* **Email:** Update the email address of the customer.
* **Telephone:** Add contact number with country code.
* **Password & Confirm Password:** Add a secret password which should be more than 4 letters.
* **Security Question & Security Answer:** Update a security question from the dropdown menu and write an answer to it. This will help the system to identify the real customer in case of forgetting the password and facing any issues while logging in to the account.
* **Customer Group:** You can also assign a customer group to the customer for any classification you want. You can select from the dropdown option.
* **Newsletter:** You can also enable the “Subscribe” button which means that the customer has subscribed to the newsletter and will be added to the audience list automatically.
* **Status:** Enable the status of the customer so that it is treated as an active customer.

You can see the below screen from the **“Address”** tab.

<figure><img src="https://2174323930-files.gitbook.io/~/files/v0/b/gitbook-x-prod.appspot.com/o/spaces%2F-MkrAx-51uwuvDxM_Z3r%2Fuploads%2F0hGYBXGvwTCYo8meJnD4%2Fimage.png?alt=media&amp;token=fe857655-f8e9-4e8e-8cb9-5cf79ac55b3d" alt=""><figcaption></figcaption></figure>

Click on the **“+” icon** to add the address. The following fields will show:

<figure><img src="https://2174323930-files.gitbook.io/~/files/v0/b/gitbook-x-prod.appspot.com/o/spaces%2F-MkrAx-51uwuvDxM_Z3r%2Fuploads%2FWZtMAhhUuWgtJbYVzN9Z%2Fimage.png?alt=media&amp;token=8ebc9479-6881-4074-a201-36dc84794cd2" alt=""><figcaption></figcaption></figure>

* **Address 1 & 2:** Add the main address in the address 1 field and you may add a secondary address (if any) in address 2. The address should include proper information on the building number, block, street, etc.
* **City:** Add the name of the city.
* **State:** Add the name of the state.
* **Postcode:** Add postal code.
* **Country:** Add the name of the country.

Click on the **“Save”** Button.

<figure><img src="https://2174323930-files.gitbook.io/~/files/v0/b/gitbook-x-prod.appspot.com/o/spaces%2F-MkrAx-51uwuvDxM_Z3r%2Fuploads%2Fq75xtwk3BlMDSrm3IC78%2Fimage.png?alt=media&amp;token=56bbc17f-ae1e-4637-bfd8-59249f97503b" alt=""><figcaption></figcaption></figure>

### Manage Customer Groups

You can add or edit customer group from the **Users > Customer Groups** from the left panel.

<figure><img src="https://2174323930-files.gitbook.io/~/files/v0/b/gitbook-x-prod.appspot.com/o/spaces%2F-MkrAx-51uwuvDxM_Z3r%2Fuploads%2FhKgGldCZZurhAv833IFX%2Fimage.png?alt=media&amp;token=a0311567-18ab-4340-8e87-060e8937182d" alt=""><figcaption></figcaption></figure>

Click on the **“+ New” Button** to add the new customer group.

<figure><img src="https://2174323930-files.gitbook.io/~/files/v0/b/gitbook-x-prod.appspot.com/o/spaces%2F-MkrAx-51uwuvDxM_Z3r%2Fuploads%2FQuazmIkhC8wsLBZjqizW%2Fimage.png?alt=media&amp;token=e6e3d9f1-2480-48c8-80e5-454fd7936af6" alt="" width="563"><figcaption></figcaption></figure>

The following fields need to be filled in while adding a new customer group:

<figure><img src="https://2174323930-files.gitbook.io/~/files/v0/b/gitbook-x-prod.appspot.com/o/spaces%2F-MkrAx-51uwuvDxM_Z3r%2Fuploads%2F3HNSHpCxoRcT3clz9HkO%2Fimage.png?alt=media&amp;token=b880a11b-21d6-4364-8b55-71438d7ee8eb" alt=""><figcaption></figcaption></figure>

* **Name:** Add the name of the customer group through which you can easily identify and assign to the customers
* **Approval:** New customers must be approved before they can log in.
* **Description:** Add the description of the customer group.

Click on the **“Save” Button.**

<figure><img src="https://2174323930-files.gitbook.io/~/files/v0/b/gitbook-x-prod.appspot.com/o/spaces%2F-MkrAx-51uwuvDxM_Z3r%2Fuploads%2FjNceMjNSxnQaIRjRO6SP%2Fimage.png?alt=media&amp;token=e024340a-0059-49f3-9e83-8df97a9e4ff3" alt=""><figcaption></figcaption></figure>

<mark style="background-color:green;">NOTE: You can also add customers from your POS.</mark>


# Orders Management

## Order List

You can view the list of orders from **Sales > Orders** from the left panel of the admin panel/backend area.

<figure><img src="https://2174323930-files.gitbook.io/~/files/v0/b/gitbook-x-prod.appspot.com/o/spaces%2F-MkrAx-51uwuvDxM_Z3r%2Fuploads%2F3Gzzu7DGv5ROLumbBltE%2Fimage.png?alt=media&amp;token=23d6626e-cd57-4a94-b521-188914b00c8f" alt=""><figcaption></figcaption></figure>

All orders are listed here with their ID, Order #, Table, Status, Type, Payment, Total Amount, Time, and Date.

You can edit by clicking on the&#x20;

<figure><img src="https://2174323930-files.gitbook.io/~/files/v0/b/gitbook-x-prod.appspot.com/o/spaces%2F-MkrAx-51uwuvDxM_Z3r%2Fuploads%2FRycQS568ze4N7FE1Gfxv%2Fimage.png?alt=media&amp;token=afbb9c00-385a-4be4-b74d-0e49f0904166" alt=""><figcaption></figcaption></figure>

In the order tab, you will see the order details, customer details, invoice details, status history, etc.

You can notify customers by adding comments and enabling the button **“Notify the Customer”** regarding the status of the order.

<figure><img src="https://2174323930-files.gitbook.io/~/files/v0/b/gitbook-x-prod.appspot.com/o/spaces%2F-MkrAx-51uwuvDxM_Z3r%2Fuploads%2F4ZBF1duvtOaVOmDNtj2A%2Fimage.png?alt=media&amp;token=0a8866f9-a808-41e4-bea9-ab2f71ffbf3f" alt=""><figcaption></figcaption></figure>

The menu tab has the information regarding the menu as shown in the image below:![](https://2174323930-files.gitbook.io/~/files/v0/b/gitbook-x-prod.appspot.com/o/spaces%2F-MkrAx-51uwuvDxM_Z3r%2Fuploads%2FqiLl5haGwb3l7xSJ0SCj%2Fimage.png?alt=media\&token=a43abbf2-1001-432d-bccd-29366c454fc6)

In order management, you can manage invoicing, checkout, split payments, and private sales from the backend/admin area of FoodBucket.

Login to your Admin Panel/Backend Area. Go to **System > Settings** from the left menu and click on the Order tab.

### Invoicing

**Invoice Prefix**

The invoice Prefix is the sequence in which the invoice number generates. You can set the invoice prefix (e.g. INV-2015-001123). Leave blank to use no prefix. The following macros are available: **{year} {month} {day}**

<figure><img src="https://2174323930-files.gitbook.io/~/files/v0/b/gitbook-x-prod.appspot.com/o/spaces%2F-MkrAx-51uwuvDxM_Z3r%2Fuploads%2FLs8WaA6g1p0j596oQYe9%2Fimage.png?alt=media&amp;token=774094b8-ecf7-4e35-aacc-a3c85180628c" alt=""><figcaption></figcaption></figure>

### **Generate Invoice**

You can either generate an invoice automatically or manually from this button.

<figure><img src="https://2174323930-files.gitbook.io/~/files/v0/b/gitbook-x-prod.appspot.com/o/spaces%2F-MkrAx-51uwuvDxM_Z3r%2Fuploads%2FffGtuT0sPePf13cQcrnE%2Fimage.png?alt=media&amp;token=14768b12-83c1-4601-aead-313e734e587a" alt=""><figcaption></figcaption></figure>

#### Generate Automatic Invoice

Generate invoice automatically as soon as the order is marked complete.

#### Generate Manual Invoice

You can generate an invoice manually by clicking generate button on the order page.

### Checkout

Checkout will give you the following options:

<figure><img src="https://2174323930-files.gitbook.io/~/files/v0/b/gitbook-x-prod.appspot.com/o/spaces%2F-MkrAx-51uwuvDxM_Z3r%2Fuploads%2FOn1n2KmqUAW3VW2fzro1%2Fimage.png?alt=media&amp;token=ff514eb0-538a-4b10-964b-d1ee71765401" alt=""><figcaption></figcaption></figure>

* **Default Order Status:** Select the default order status when a new order is placed/received by dropdown options.
* **Processing Order Status**: Select the order status. An order must reach before the order starts stock reduction and coupon redemption by dropdown options.
* **Served/Prepared/Delivered Order Status:** This order status is used to highlight the order state depending on its type, dine = served, takeaway & delivery = delivered.
* **Payment Order Status:** Select the order status when an order is awaiting payment clearance before it can be marked as completed or served depending on its type.
* **Completed Order Status:** Select the order status to mark an order as completed before the order invoice is created and a customer can leave a review.
* **Cancellation Order Status**: Select the order status when an order is marked as canceled or suspected of fraudulent activity.
* **Delivery Time:** Set the number of minutes an order will be delivered after being placed.
* **Take Away Time:** Set the number of minutes an order will be ready for take away after being placed.
* **Allow Guest Order:** Allow customers to place an order without creating an account.
* **Require Location To Order:** Set whether customer MUST enter their postcode/address before they can place an order. If disabled, the customer will be allowed to order without entering their postcode/address but still require their delivery address to be covered.
* **Accept Future Orders:** Allow customers to place an order for later when the restaurant is closed for delivery or takeaway during opening hours. This setting affects all locations

### Split Payments

FoodBucket allows you to accept split payments which means allowing takeaway and print tickets automatically. Please read the complete documentation [here](https://support.foodbucket.io/knowledge-base/split-payment/).

### Private Sales

You can enable private sales on a private table from **System > Order > Private Sales**.&#x20;


# POS Management

### POS Manager

POS manager allows you to keep track of all Points of Sales that you have in your restaurants. For instance, your restaurant has 3 POS. One POS handles app POS operations, the second POS is Order taking POS and which takes orders from the customers that are dining in your restaurant and the third POS is Delivery POS which only takes delivery orders from your customers.

You can access POS Manager by clicking on **POS Manager** from the left panel. It has the list of POS with active/inactive status.

<figure><img src="https://2174323930-files.gitbook.io/~/files/v0/b/gitbook-x-prod.appspot.com/o/spaces%2F-MkrAx-51uwuvDxM_Z3r%2Fuploads%2FAwZb7ADgQB4wcleAnETx%2Fimage.png?alt=media&amp;token=d9014704-4ec7-4cf4-9071-78f13dbac333" alt=""><figcaption></figcaption></figure>

#### Add a POS

You can add a POS by clicking on **+ Add New POS** Button.

<figure><img src="https://2174323930-files.gitbook.io/~/files/v0/b/gitbook-x-prod.appspot.com/o/spaces%2F-MkrAx-51uwuvDxM_Z3r%2Fuploads%2FPUIDKqVZPY9lTnsPbnAF%2Fimage.png?alt=media&amp;token=9d96c3cd-6e90-478e-8570-6652b5237f47" alt=""><figcaption></figcaption></figure>

A pop-up will appear shown in the image below:

<figure><img src="https://2174323930-files.gitbook.io/~/files/v0/b/gitbook-x-prod.appspot.com/o/spaces%2F-MkrAx-51uwuvDxM_Z3r%2Fuploads%2F9ltvxfupZPXLHKqqjsML%2Fimage.png?alt=media&amp;token=e5b85d02-c7a8-45e4-a7e7-b0cce425381e" alt=""><figcaption></figcaption></figure>

* **POS Name:** Add the name of the POS.
* **POS Status:** You can select active or inactive POS from this button.
* Click on the **“Add” button.**

#### Delete a POS

You can delete the POS by clicking on the **“Delete”** button from the POS List Screen.

<figure><img src="https://2174323930-files.gitbook.io/~/files/v0/b/gitbook-x-prod.appspot.com/o/spaces%2F-MkrAx-51uwuvDxM_Z3r%2Fuploads%2FxMMVUqjBeFXPaJjNmncd%2Fimage.png?alt=media&amp;token=a49672dd-dc56-4f68-b542-f336f9c29f13" alt=""><figcaption></figcaption></figure>

#### POS Report

You can also fetch POS reports to analyze the performance of different POS.


# License & Billing

## License Information

You can view all the license information here, including:

<figure><img src="https://2174323930-files.gitbook.io/~/files/v0/b/gitbook-x-prod.appspot.com/o/spaces%2F-MkrAx-51uwuvDxM_Z3r%2Fuploads%2FtcksoqqbR63tD0ilDdoT%2Fimage.png?alt=media&amp;token=6c462429-00a5-4b5c-b415-9ac26fa9d3f2" alt=""><figcaption></figcaption></figure>

| Display Name        | Purpose                                                                                              |
| ------------------- | ---------------------------------------------------------------------------------------------------- |
| Licensed To         | The plan you are licensed to. There are 4 license plans including Basic, Standard, Pro and Ultimate. |
| Licensed Status     | Status of the license (Active or Inactive).                                                          |
| License Key         | License key against which your plan is active.                                                       |
| License Expiry Date | Expiry date of the license including time.                                                           |
| Total Number of POS | Total number of POS that are available on the plan.                                                  |
| Total Number of KDS | Total number of KDS that are available on the plan.                                                  |

#### Recheck

You can refresh the License Details by clicking on the "Recheck" button. License is usually checked timely, but if you want to fetch the latest information, click on "Recheck".

#### Update License

To update and activate the license, enter the license key here.

<figure><img src="https://2174323930-files.gitbook.io/~/files/v0/b/gitbook-x-prod.appspot.com/o/spaces%2F-MkrAx-51uwuvDxM_Z3r%2Fuploads%2Ff8G4vyYRoTK2vEu5sRy6%2Fimage.png?alt=media&amp;token=334468a8-d2d4-483f-be28-bd5082be36da" alt=""><figcaption></figcaption></figure>

### FoodBucket Plans

FoodBucket offers 4 licensing plans ranging from $29.99 to $89.99. Below are the details of the plan:

| Plan     | FoodBucket Base License | Price  | No. of POS | No. of KDS |
| -------- | ----------------------- | ------ | ---------- | ---------- |
| Ultimate | Yes                     | $89.99 | 6          | 6          |
| Pro      | Yes                     | $69.99 | 4          | 4          |
| Standard | Yes                     | $49.99 | 3          | 2          |
| Basic    | Yes                     | $29.99 | 2          | 0          |

<mark style="background-color:red;">**NOTE:**</mark> <mark style="background-color:red;"></mark><mark style="background-color:red;">If you are upgrading or downgrading your subscription, your current subscription will be unsubscribed and your new subscription and license key will be sent to your email address.</mark>


# Locations Management

Location management is an essential feature for any food business with multiple locations. FoodBucket provides a location management system that makes it easy to manage different locations from one central location. With FoodBucket's location management system, businesses can manage inventory, orders, and employee scheduling across multiple locations.

### Benefits of Location Management

There are several benefits of using a location management system like FoodBucket's:

* **Efficiency:** Location management helps to streamline business operations and increase efficiency by allowing businesses to manage multiple locations from one central location. This reduces the need for duplicate data entry and simplifies administrative tasks.
* **Increased visibility:** Location management provides real-time visibility into the operations of each location, allowing businesses to quickly identify and address issues. This helps to prevent potential problems and ensures that all locations are operating smoothly.
* **Better inventory management:** FoodBucket's location management system allows businesses to manage inventory levels across all locations. This ensures that each location has the necessary inventory to meet demand while avoiding overstocking.
* **Improved customer experience:** Location management helps businesses to deliver a consistent customer experience across all locations. This includes ensuring that all locations have the same menu items, prices, and promotions.

### How FoodBucket Location Management Works

FoodBucket's location management system is designed to be easy to use. Here's how it works:

1. **Set up each location:** Businesses can add and set up each location through the FoodBucket dashboard. This includes adding location-specific information such as address, hours, and menu items.
2. **Manage inventory:** Businesses can manage inventory levels across all locations from the FoodBucket dashboard. This ensures that each location has the necessary inventory to meet demand.
3. **Manage orders:** FoodBucket's location management system allows businesses to manage orders across all locations. This includes the ability to view and track orders from each location in real time.
4. **Manage employee scheduling:** Businesses can manage employee scheduling across all locations from the FoodBucket dashboard. This helps to ensure that each location is properly staffed to meet demand.

### Conclusion

In conclusion, location management is an essential feature for businesses with multiple locations. FoodBucket's location management system provides businesses with the tools they need to manage inventory, orders, and employee scheduling across multiple locations, increasing efficiency, improving the customer experience, and providing real-time visibility into operations.

<br>


# Multi-Location Dashboard


# Troubleshooting


# Discounts & Coupons

### Overview

FoodBucket has one of the best Discounts & Coupons Management systems that any POS allows. Upon constant feedback from our customers, we have improvised every step and made it immensely easy for managers to apply discounts without causing damage to company revenue due to our strict workflows and access limitation.

Our System Made and User Made discounts allow Restaurant owners to identify what's being applied. with our Unpaid and Paid Invoices, Customers always know what they are paying for and eventually eliminate any flaws.

Before we take a start. Let’s understand the difference between discounts & coupons

### Difference Between Discounts & Coupons

#### **Discounts**

Discounts are applied via **POS** Manually or Automatically and on the Website if there are any matched criteria, automatic discounts are applied.

We have two different types of Discounts

* **System Discounts:** That is system generated, pre-defined, and automatically applies. Managers cannot change its value or criteria.
* **Manual Discounts:** These are manually created when accepting payment, they are logged in the backend and are created against a Customer’s name and Restaurant owners can also see who created the discount.

From POS only managers who have permissions can apply Manual discounts while System Discounts are automatically applied.

Here is a screenshot where you can see discounts on POS:

<figure><img src="https://2174323930-files.gitbook.io/~/files/v0/b/gitbook-x-prod.appspot.com/o/spaces%2F-MkrAx-51uwuvDxM_Z3r%2Fuploads%2FCTdB1DQCQETETRqRkLRA%2Fimage.png?alt=media&amp;token=c6eebd38-40c7-4afe-ac36-de8c37d5105f" alt=""><figcaption></figcaption></figure>

Click on Add Discount button to see Add Discount Window

* **System Discount** will show all available discounts
* Add new **individual discount**
* New will create a new **system discount** (depending on permission).
* **The manual** will show all previously created discounts by the logged-in manager

**Coupons**

Coupons are the same as discounts, they are only used for the website.

<figure><img src="https://2174323930-files.gitbook.io/~/files/v0/b/gitbook-x-prod.appspot.com/o/spaces%2F-MkrAx-51uwuvDxM_Z3r%2Fuploads%2FlLdkno5xdeigNv0Dznse%2Fimage.png?alt=media&amp;token=38e23f1e-8760-4db8-aa6a-1100ac1463eb" alt="" width="356"><figcaption></figcaption></figure>

### Add a New Discount

To create a new discount, follow the steps given below:

1. Login to your Admin Area/Backend
2. Go to **Sales > Discounts** from the left menu
3. Here you will see **the + New button,** click on it and the discount form will appear
4. Fill out the form, as explained below.
5. Click **“Save & Close”** to create a new discount

<figure><img src="https://2174323930-files.gitbook.io/~/files/v0/b/gitbook-x-prod.appspot.com/o/spaces%2F-MkrAx-51uwuvDxM_Z3r%2Fuploads%2F5Tbg5EQ8rqRiOAhR7IYF%2Fimage.png?alt=media&amp;token=50cbbbed-3a77-4984-92fb-63255ef99897" alt=""><figcaption></figcaption></figure>

**Discount Details**

Here you will fill the complete form as per your need. Following are the fields and their purpose and what to put.

* Name | Name of the discount e.g. Brunch Offer. Type | Whether to subtract a Fixed amount or Percentage from order total. Discount | Enter amount of discount in percentage or currency. Status | Enable or Disable the discount. Scope | Whether to make Discount | Manual: This is a discount applied manually. Authentication is required. | System: This discount is applied automatically. No Authentication is required.

Criteria Form

* Order Type: Choose between:
  * Take Away
  * Dine or Delivery Orders.
* Payment Method: Select which payment methods are applicable.
* Validity:
  * Forever: Discount will stay active forever.
  * Fixed: Set to and from time of the day e.g. set expiry date to future date or leave blank for no expiry. Enter 4 p.m. to 5 p.m. for applicable time.
  * Period: Discount will stay active between the selected Start and End dates.
  * Recurring: Set specific days of the week and specific time of the day. For example, you want to set happy hours from 4 p.m. to 6 p.m. on weekends you will set in the following way:
* Min Threshold: Min amount required to apply discount. 0 means no threshold.
* Max Threshold: Max amount required to apply discount. 0 means no threshold.

## Menu Criteria

You can also apply further criteria on order based on your menu items. For example, you want to apply discounts only on specific drinks during the happy hour, you will configure it as image shown below:

* Enable Menu Criteria: Enable or disable the criteria.
* Filter Type: Whether to include added menu Items or exclude.
* Menu Items: List of Items that you want to add in the criteria.

## Discount History

You can see discount history by following the steps given below:

1. Go to Sales > Discounts from the left menu
2. Click on the name of the discount you want to see history of
3. Here you will see a History Tab, click on it
4. You will be able to see all existing discount usages order by date applied

## Edit Discount

To edit discount, follow the steps below:

1. Login to Admin Area/Backend
2. Go to Sales > Discount from the left menu
3. There you will see all discounts created, you can filter or search discounts from the top right box
4. Click on the ‘pencil‘ icon to edit the discount
5. Once you are done making changes, click on ‘Save & Close‘ button to save changes

## Delete Discount

To delete discount, follow the steps below:

1. Login to Admin Area/Backend
2. Go to Sales > Discount from the left menu
3. There you will see all discounts created, you can filter or search discounts from the top right box
4. Click on the check box next to discount you want to delete
5. Click on the red “Delete” button on the top and click ‘OK‘ to confirm delete.

## Add a new Coupon

Follow to steps below to add a new Coupon:

1. Login to Admin Area/Backend
2. Go to Sales > Coupons from the left menu
3. Here you will see + New button. Click on it and discount form will appear
4. Fill out the form, as explained below.
5. Click “Save & Close” to create new discount

### Coupon Form

* Coupon Name: Set a name of your Coupon.
* Code: Coupon code is used to redeem the code on the website.
* Type: Whether to subtract a fixed amount or percentage from order total.
* Discount: Total amount or percentage to give discount.
* Redemptions: The total number of times this coupon can be redeem. Enter 0 for unlimited redemptions.
* Customer Redemptions: The number of times a specific customer can redeem this coupon. Enter 0 for unlimited redemptions.
* Minimum Total: Minimum amount required to apply coupon on.
* Validity:
  * Forever: Discount will stay active forever.
  * Fixed: Set to and from time of the day e.g. set expiry date to future date or leave blank for no expiry. Enter 4 p.m. to 5 p.m. for applicable time.
  * Period: Discount will stay active between the selected Start and End dates.
  * Recurring: Set specific days of the week and specific time of the day. For example, you want to set happy hours from 4 p.m. to 6 p.m. on weekends you will set in the following way:
* Order Restriction: Limit Coupons to Delivery or Takeaway.
* Description: Brief description of the coupon.
* Status: Enable or disable coupon.

#### Coupon History

You can see discount history by following the steps given below:

1. Go to Sales > Coupons from the left menu
2. Click on the name of the coupon you want to see history of
3. Here you will see a History tab, click on it
4. You will be able to see all existing coupon usages order by date applied

#### Edit Coupon

To edit coupon, follow the steps below:

1. Login to Admin Area/Backend
2. Go to Sales > Coupon from the left menu
3. There you will see all coupons created, you can filter or search coupons from the top right box
4. Click on the ‘pencil‘ icon to edit the coupon
5. Once you are done making changes, click on ‘Save & Close‘ button to save changes

#### Delete Coupon

To delete coupon, follow the steps below:

1. Login to Admin Area/Backend
2. Go to Sales > Coupon from the left menu
3. There you will see all discounts created, you can filter or search discounts from the top right box
4. Click on the check box next to coupon you want to delete
5. Click on the red “Delete” button on the top and click ‘OK‘ to confirm delete.


# Overview

## POS Overview

FoodBucket POS is designed in a way to achieve excellence. FoodBucket POS gives you direct access to all operation modes right from the main dashboard on your Point of Sale. Its smart, user-friendly interface makes it easily adaptable.

<figure><img src="https://2174323930-files.gitbook.io/~/files/v0/b/gitbook-x-prod.appspot.com/o/spaces%2F-MkrAx-51uwuvDxM_Z3r%2Fuploads%2F7XA8YJghAacbZ40pHB48%2Fimage.png?alt=media&amp;token=ed75b1e3-7710-488d-ae66-83bcee22e393" alt="" width="563"><figcaption></figcaption></figure>

Download the FoodBucket App from the link below:

* Android App
* iOS App
* Windows App

After downloading the app, follow the simple steps to get started.

### Server Screen

<figure><img src="https://2174323930-files.gitbook.io/~/files/v0/b/gitbook-x-prod.appspot.com/o/spaces%2F-MkrAx-51uwuvDxM_Z3r%2Fuploads%2F1IzOFVlKPQb8l42Vwrps%2Fimage.png?alt=media&amp;token=61def248-8fd5-48b9-98a6-7b6c92a6d12c" alt="" width="563"><figcaption></figcaption></figure>

A server screen shows a dialog box in which you have to enter your application URL, e.g. **my.foodbucket.io**

### Login Screen

<figure><img src="https://2174323930-files.gitbook.io/~/files/v0/b/gitbook-x-prod.appspot.com/o/spaces%2F-MkrAx-51uwuvDxM_Z3r%2Fuploads%2FPsJ3XrW4h6TOHul9xiaN%2Fimage.png?alt=media&amp;token=bc4c5a6e-0492-42e7-9767-4a536bd4d0d2" alt="" width="563"><figcaption></figcaption></figure>

You can log in to the POS by entering your credentials as shown in the image above. It also shows the last login of the staff members.

### Home Screen

<figure><img src="https://2174323930-files.gitbook.io/~/files/v0/b/gitbook-x-prod.appspot.com/o/spaces%2F-MkrAx-51uwuvDxM_Z3r%2Fuploads%2FCTa7iYDeaEaWCUqE7j9x%2Fimage.png?alt=media&amp;token=77a31e5a-e2e8-43c9-bea4-fc4b05a6889b" alt="" width="563"><figcaption></figcaption></figure>

FoodBucket home screen allows you to manage the Tables, Orders Types, and Order times. The following points are explaining each section:

1. It shows you the number of tables occupied or vacant. You can also monitor the order time on each occupied table. The above bar shows the Order status.

   <mark style="color:green;">**Green**</mark> – On-time  <mark style="color:red;">**Red**</mark> – Late
2. Your takeaway orders are listed alongside the **TAKEAWAY** button with the order number and also show the time when the order is punched.
3. Your delivery orders are listed alongside the **DELIVERY** button with the order number and also show the time when the order is punched.
4. Here you can check the menu.
5. Here you can add expenses.
6. Here you can manage your orders e.g. Delivery orders, Take Away orders, Dine-in.

### Order Screen

<figure><img src="https://2174323930-files.gitbook.io/~/files/v0/b/gitbook-x-prod.appspot.com/o/spaces%2F-MkrAx-51uwuvDxM_Z3r%2Fuploads%2FxVfCFd2f5mZecwXlMews%2Fimage.png?alt=media&amp;token=3931d455-d960-4184-8bfc-bd45d2af4580" alt="" width="563"><figcaption></figcaption></figure>

Here you can punch the orders.

1. The main categories of the menu are shown here.
2. This will show the menu on the basis of the categories you have selected in Section 1.
3. Here you can review the order details you have punched.
4. You can enter your customer information. i.e. Name, Contact number, and Address.
5. You can choose the table to place the order or you can also select the table from the home screen.
6. Here you can choose the order type i.e. Dine-in, Take Away, and Delivery.
7. After punching the order, tap the “Pay” button to checkout.
8. You can remove the whole order from the “Remove” button. The “Clear” button is to clear the list of items and you can re-order. The “Draft” button is to save the order for later use.

### Runner Screen

<figure><img src="https://2174323930-files.gitbook.io/~/files/v0/b/gitbook-x-prod.appspot.com/o/spaces%2F-MkrAx-51uwuvDxM_Z3r%2Fuploads%2FHsfJQdDKVZjOUTAcFfsv%2Fimage.png?alt=media&amp;token=162baa2b-c35b-4015-ab47-4a3bebae4180" alt="" width="563"><figcaption></figcaption></figure>

Runner Screen shows the status of the running order. You can tap on the occupied table to view the running screen. The following points explain every section of the screen:

<figure><img src="https://2174323930-files.gitbook.io/~/files/v0/b/gitbook-x-prod.appspot.com/o/spaces%2F-MkrAx-51uwuvDxM_Z3r%2Fuploads%2F8bST6MAramSd2BbYqJIP%2Fimage.png?alt=media&amp;token=09952f40-6c81-4a49-bde3-f19a137c0b1e" alt=""><figcaption></figcaption></figure>

1. It shows the order number. Order numbers reset on the day close.
2. It allows you to shift the order to any other open table.
3. You can choose the order type from here i.e. Dine-in, Take Away, and Delivery.
4. Tells you the order status i.e. Preparation or Ready.

   <figure><img src="https://2174323930-files.gitbook.io/~/files/v0/b/gitbook-x-prod.appspot.com/o/spaces%2F-MkrAx-51uwuvDxM_Z3r%2Fuploads%2FBDsknNkHin29ptMRlLvG%2Fimage.png?alt=media&amp;token=62ee94b1-5e52-4676-9afe-0e80fcf68158" alt=""><figcaption></figcaption></figure>
5. An order identifier is a unique order ID allotted from the backend.
6. Shows the time of order.
7. Tells you the name of the order taker.
8. Shows you the customer information.

   <figure><img src="https://2174323930-files.gitbook.io/~/files/v0/b/gitbook-x-prod.appspot.com/o/spaces%2F-MkrAx-51uwuvDxM_Z3r%2Fuploads%2FxhKXzegBXPaxeZkEot4J%2Fimage.png?alt=media&amp;token=553745d9-8746-4540-bd71-97a32c16acff" alt=""><figcaption></figcaption></figure>
9. Shows the details of the order.

   <figure><img src="https://2174323930-files.gitbook.io/~/files/v0/b/gitbook-x-prod.appspot.com/o/spaces%2F-MkrAx-51uwuvDxM_Z3r%2Fuploads%2FHBAUM2VX8DYWb3WCnEkW%2Fimage.png?alt=media&amp;token=8f233289-d2ad-426d-9bca-352c541ade59" alt=""><figcaption></figcaption></figure>
10. Running Button allows you to view the order screen where already punched items will be displayed in the left panel and you can add more items in the running order from here.
11. Here you can cancel the order. It will ask for access. You can enter credentials and continue.
12. After preparation, you can serve the order. On tapping the serve button
13. The pay button will lead you to the checkout screen where you will select the payment method.
14. Here you can merge the tables e.g. if you do not have enough capacity on a single table, you can merge the tables.

## Settings

<figure><img src="https://2174323930-files.gitbook.io/~/files/v0/b/gitbook-x-prod.appspot.com/o/spaces%2F-MkrAx-51uwuvDxM_Z3r%2Fuploads%2FZGGIGLQWwXubaqkeh1Ko%2Fimage.png?alt=media&amp;token=ab758688-0fed-4efa-bf2b-e0392ba58466" alt="" width="563"><figcaption></figcaption></figure>

Click on **“Settings”** from the side panel of your POS.

Settings consist of three main heads:

### General Settings

* You can set your General Settings
* You can your POS Default Screen
* You can set the Quick Service orders
* You can set your POS Display Settings for Tables, Categories & Menu items Row
* You can change your language In the POS

### Printers & Hardware

<figure><img src="https://2174323930-files.gitbook.io/~/files/v0/b/gitbook-x-prod.appspot.com/o/spaces%2F-MkrAx-51uwuvDxM_Z3r%2Fuploads%2FssrOp7SXIXnqLqHTLPYf%2Fimage.png?alt=media&amp;token=4cb075ca-5bd4-4cc4-9a58-31cf7c7e48d9" alt="" width="563"><figcaption></figcaption></figure>

* You can add your thermal Printer in the POS for Receipts & Kitchen Copies
* Set your receipt filters

### Customer Facing App

<figure><img src="https://2174323930-files.gitbook.io/~/files/v0/b/gitbook-x-prod.appspot.com/o/spaces%2F-MkrAx-51uwuvDxM_Z3r%2Fuploads%2FerHlWhNlfHHs67OvoC4b%2Fimage.png?alt=media&amp;token=a396630a-1963-4b84-be9f-aed4c450cbb5" alt=""><figcaption></figcaption></figure>

* FoodBucket's customer-facing app offers a seamless and convenient way for customers to browse the menu, place orders, and track their delivery status in real time.
* With personalized recommendations, loyalty programs, and exclusive offers, the FoodBucket app provides a superior ordering experience that keeps customers coming back for more.

### Troubleshoot

* You can change your server from here
* You can check from which server you are connected to.


# Connect, Set Role, Sync Settings

Our POS System is relatively very easy to connect and in this guide, we will show you how.

If you have not installed our app yet, read this guide first.

## Connect to Server

<figure><img src="https://2174323930-files.gitbook.io/~/files/v0/b/gitbook-x-prod.appspot.com/o/spaces%2F-MkrAx-51uwuvDxM_Z3r%2Fuploads%2FsQZKIoYxSXNJ9wIaNKuN%2Fimage.png?alt=media&amp;token=1dc7855d-2dec-4bc9-90df-daa2137fc988" alt="" width="563"><figcaption></figcaption></figure>

Our POS does not work independently without a server as it’s meant to allow users to interact with our system through a user-friendly interface across all platforms and everything is managed at the back end.

When you open our app, you will see the following screen:

The first field, where you can see ‘my.foodbucket.io’, is called Server URL without HTTP or HTTPS or:// The second field is server port, it is required in some cases

### On-Premise (Appliance)

If you have our Appliance installed in your restaurant, you can simply put **my.foodbucket.io** as your server, just follow the steps below:

* Connect to FoodBucket Network Wi-Fi
* Enter **my.foodbucket.io** in the Server field
* Enter port (if provided by our staff) or leave blank, it's usually **80 or 4848**
* Press <mark style="color:blue;">**“Continue”**</mark>

### For Cloud

Connect to any network

* Enter **youridentifer.cloud.foodbucket.io**
* Enter port (if provided by our staff) or leave blank, it's usually **80 or 4848**
* Press <mark style="color:blue;">**“Continue”**</mark>

### For Legacy (Older Installation On-Premise)

* Connect to FoodBucket Network Wi-Fi
* Enter 192.168.0.150
* Enter port **4848**
* Press <mark style="color:blue;">**“Continue”**</mark>

Once you are successfully connected, you will see the following screen:

<figure><img src="https://2174323930-files.gitbook.io/~/files/v0/b/gitbook-x-prod.appspot.com/o/spaces%2F-MkrAx-51uwuvDxM_Z3r%2Fuploads%2F7QWlUcKtvFfcI0cWM5FI%2Fimage.png?alt=media&amp;token=5c86d3c4-fc4c-4546-8893-c5cd6a7e3564" alt="" width="563"><figcaption></figcaption></figure>

* **User ID:** Your username provided by our staff or your email ID when you created it online.
* **Password:** Your password provided by our staff or when you entered while creating an online account.

Once you are successfully logged in, you will be directed to this screen:

<figure><img src="https://2174323930-files.gitbook.io/~/files/v0/b/gitbook-x-prod.appspot.com/o/spaces%2F-MkrAx-51uwuvDxM_Z3r%2Fuploads%2FAeuU9joj77Qu9OReqXee%2Fimage.png?alt=media&amp;token=847f522b-fbcf-444a-91bf-c5f6189b8884" alt=""><figcaption></figcaption></figure>

### Set Role of the POS

Setting up a POS role will help you manage your orders easily when you have multiple channels opened. By default, you will see all types of orders on POS with filters of buttons on the right side.

In order to change, follow the steps given below:

* From your POS Home screen, click on the Top Left Menu Icon
* Go to Settings
* Click on General Settings
* You will see the following options:

<figure><img src="https://2174323930-files.gitbook.io/~/files/v0/b/gitbook-x-prod.appspot.com/o/spaces%2F-MkrAx-51uwuvDxM_Z3r%2Fuploads%2FRQUbOgtESS5CaxVnNbQN%2Fimage.png?alt=media&amp;token=8031532d-75ad-4e50-9579-84f8b5a0135b" alt=""><figcaption></figcaption></figure>

#### Show Home Screen

* This will show or hide the buttons on the right side.

#### Home Screen Type

* This will set the default Home Screen type. If you want to show “Delivery Orders” on the screen, simply select “Delivery” and turn off Show Home Screen.

### Sync & Refresh

* Fetch Configs downloads the latest settings from the POS and works accordingly. This is mainly used to update the latest menu prices, tax, and other payment-related configurations.

To fetch and sync settings, follow the steps below:

* Go to the Top Left Menu button
* Go to Settings from the menu
* Click on Sync & Refresh
* Click and Sync & Refresh

<figure><img src="https://2174323930-files.gitbook.io/~/files/v0/b/gitbook-x-prod.appspot.com/o/spaces%2F-MkrAx-51uwuvDxM_Z3r%2Fuploads%2F1iNMwRN5qo8KSamxPy57%2Fimage.png?alt=media&amp;token=f00ac13d-7958-46ca-884a-180614249d2d" alt="" width="563"><figcaption></figcaption></figure>


# Adding Order

### Overview

FoodBucket has keenly developed the workflow of adding an order to bring ease to your restaurant operations. The user-Interface of the POS is clear, clean, and self-explanatory.

You can add an order according to order type that includes dine-in orders, delivery orders,s or takeaway orders. This segregation will help you identify the offer and accelerate the whole process.

<figure><img src="https://2174323930-files.gitbook.io/~/files/v0/b/gitbook-x-prod.appspot.com/o/spaces%2F-MkrAx-51uwuvDxM_Z3r%2Fuploads%2F5DlgexgwCRZixsbHPLBW%2Fimage.png?alt=media&amp;token=6b6b5ca5-08a6-467a-8531-38536ab63293" alt="" width="563"><figcaption></figcaption></figure>

### Dine-In Order

You can add dine-in orders by tapping on the table. Dine-in orders are marked with a green bar on the table along with the time and status.

### Takeaway Order

To add takeaway order, tap on the “Takeaway” button from the main screen of the POS. You can see all the takeaway orders next to the takeaway button.

### Delivery Order

To add delivery order, tap on the “Delivery” button from the main screen of the POS. You can see all the delivery orders next to the takeaway button.

## Punch/Add an Order

1. To punch an order, select the category.

   <figure><img src="https://2174323930-files.gitbook.io/~/files/v0/b/gitbook-x-prod.appspot.com/o/spaces%2F-MkrAx-51uwuvDxM_Z3r%2Fuploads%2Ff2z6xk8sQmo9ogdRTriy%2Fimage.png?alt=media&amp;token=b9edbf8e-9e81-479c-8050-c92fd89e31c3" alt="" width="563"><figcaption></figcaption></figure>
2. Menu items will be displayed according to the selected category.
3. You can quickly add the menu item by tapping on the **"+" Button.**&#x20;

   <figure><img src="https://2174323930-files.gitbook.io/~/files/v0/b/gitbook-x-prod.appspot.com/o/spaces%2F-MkrAx-51uwuvDxM_Z3r%2Fuploads%2Fwppg4AE4RzxX9vtKBprD%2Fimage.png?alt=media&amp;token=585a2bdb-6b1b-44e4-b599-4b470599b497" alt="" width="563"><figcaption></figcaption></figure>
4. Tap on the menu items to add details and select menu options.
5. Choose between the options.

   <figure><img src="https://2174323930-files.gitbook.io/~/files/v0/b/gitbook-x-prod.appspot.com/o/spaces%2F-MkrAx-51uwuvDxM_Z3r%2Fuploads%2F0WZSevfUhJZCTNkHGtJZ%2Fimage.png?alt=media&amp;token=797720f8-2de7-4988-a1ac-a669cec13f6b" alt="" width="563"><figcaption></figcaption></figure>
6. Tap on the **“Add to Basket”** button.

Your item will be added and shown on the left menu detail section.

<figure><img src="https://2174323930-files.gitbook.io/~/files/v0/b/gitbook-x-prod.appspot.com/o/spaces%2F-MkrAx-51uwuvDxM_Z3r%2Fuploads%2FqRlSrvXX8iZG383nUNW8%2Fimage.png?alt=media&amp;token=b537bc81-ee4a-495b-a41e-517c664c9e5d" alt="" width="563"><figcaption></figcaption></figure>

### Add Customer

Tap on “Enter Here” to add customer details. A new dialog box will open. Add the contact number (landline or mobile) to search the name of the customer, and his address (area, city). Click on the “Update” button.

<figure><img src="https://2174323930-files.gitbook.io/~/files/v0/b/gitbook-x-prod.appspot.com/o/spaces%2F-MkrAx-51uwuvDxM_Z3r%2Fuploads%2F3ZF73mTcxGIddeBxXdxC%2Fimage.png?alt=media&amp;token=a8e0a3af-b3bd-4b88-a919-9961bc402a1f" alt="" width="563"><figcaption></figcaption></figure>

### Choose Table

Here you can also change the table.

<figure><img src="https://2174323930-files.gitbook.io/~/files/v0/b/gitbook-x-prod.appspot.com/o/spaces%2F-MkrAx-51uwuvDxM_Z3r%2Fuploads%2FlMdCiG0Ed1gaj7PH13h5%2Fimage.png?alt=media&amp;token=d2dcbec5-c94d-4a9a-9f06-8e3e82b94932" alt="" width="563"><figcaption></figcaption></figure>

### Select Order Type

11. Order type can be changed too.

    <figure><img src="https://2174323930-files.gitbook.io/~/files/v0/b/gitbook-x-prod.appspot.com/o/spaces%2F-MkrAx-51uwuvDxM_Z3r%2Fuploads%2F79qxG6IZUKMudqegRiyu%2Fimage.png?alt=media&amp;token=20613d1c-63e9-43dc-8902-05b7fa980aa3" alt="" width="563"><figcaption></figcaption></figure>
12. Tap on **Continue**

### Select Payment Method

13. Select the payment method, and add the amount.

<figure><img src="https://2174323930-files.gitbook.io/~/files/v0/b/gitbook-x-prod.appspot.com/o/spaces%2F-MkrAx-51uwuvDxM_Z3r%2Fuploads%2F3myRMx77uSgst1kVC0T5%2Fimage.png?alt=media&amp;token=aa672a00-bd30-4e1d-ae5d-94f052debf23" alt="" width="563"><figcaption></figcaption></figure>

### Add Discount

For a discount, tap on **“Add Discount”.**&#x20;

<figure><img src="https://2174323930-files.gitbook.io/~/files/v0/b/gitbook-x-prod.appspot.com/o/spaces%2F-MkrAx-51uwuvDxM_Z3r%2Fuploads%2FZlxrzk61I59uE7TKWVjb%2Fimage.png?alt=media&amp;token=111fe907-dbb6-4ed5-a576-35f7be8af60d" alt="" width="563"><figcaption></figcaption></figure>

You can either add discounts manually or through system-added discounts. For adding discounts and coupons from the admin area, please read the documentation here.

<figure><img src="https://2174323930-files.gitbook.io/~/files/v0/b/gitbook-x-prod.appspot.com/o/spaces%2F-MkrAx-51uwuvDxM_Z3r%2Fuploads%2FawvcORQZdKhzrjRe2Mvd%2Fimage.png?alt=media&amp;token=ea29850a-9f61-4805-986a-1b3ed7d2a0b8" alt="" width="563"><figcaption></figcaption></figure>

&#x20;You can collect the payment in advance and place the order. Otherwise, you can tap on send to the kitchen and receive the payment afterward.

### Add Service Fee

You can add a service fee by tapping **“Add Services”.**

<figure><img src="https://2174323930-files.gitbook.io/~/files/v0/b/gitbook-x-prod.appspot.com/o/spaces%2F-MkrAx-51uwuvDxM_Z3r%2Fuploads%2FzJzItxXXFjks67RVk4kJ%2Fimage.png?alt=media&amp;token=05d9bcfa-7e4e-45f7-a05a-8d32b541d343" alt="" width="563"><figcaption></figcaption></figure>

&#x20;A new dialog box opens with an added-on service fee, you can select existing or add new by tapping on **"Quick Add"** Service fees can be charged as a fixed amount or percentage of an order.

<figure><img src="https://2174323930-files.gitbook.io/~/files/v0/b/gitbook-x-prod.appspot.com/o/spaces%2F-MkrAx-51uwuvDxM_Z3r%2Fuploads%2F55SWgzx0YX2hEpcF8Ipf%2Fimage.png?alt=media&amp;token=515e8227-b399-4782-bc26-1339b4b69df3" alt="" width="563"><figcaption></figcaption></figure>

### Send to Kitchen

You can send an order to the kitchen via KOT or your order is directly shown on the Kitchen Display Screen.

<figure><img src="https://2174323930-files.gitbook.io/~/files/v0/b/gitbook-x-prod.appspot.com/o/spaces%2F-MkrAx-51uwuvDxM_Z3r%2Fuploads%2Flu8pIeuJjma80kNcRpCj%2Fimage.png?alt=media&amp;token=e7bcb0ea-de4c-4a09-ad7f-80473abadb48" alt="" width="563"><figcaption></figcaption></figure>

### Cancel Order

You can cancel the order by tapping on the booked table and tapping on the **“Cancel Order”** button as shown in the image below:

<figure><img src="https://2174323930-files.gitbook.io/~/files/v0/b/gitbook-x-prod.appspot.com/o/spaces%2F-MkrAx-51uwuvDxM_Z3r%2Fuploads%2FgTmaJoeDCa4DdPMz6vIg%2Fimage.png?alt=media&amp;token=81b62794-4ffc-4e48-83bb-de6ee19d5b43" alt="" width="563"><figcaption></figcaption></figure>

### Void Item

You can mark an item as Void by tapping on **the ‘i’** icon and selecting <mark style="color:red;">**Void**</mark>.

<figure><img src="https://2174323930-files.gitbook.io/~/files/v0/b/gitbook-x-prod.appspot.com/o/spaces%2F-MkrAx-51uwuvDxM_Z3r%2Fuploads%2FTl0lCE4Z8qdPb0aqj4Mr%2Fimage.png?alt=media&amp;token=43a1b914-3741-473c-b6a2-8b034a9a474a" alt="" width="563"><figcaption></figcaption></figure>

&#x20;Provide a reason for your action by selecting the given options or entering manually.

<figure><img src="https://2174323930-files.gitbook.io/~/files/v0/b/gitbook-x-prod.appspot.com/o/spaces%2F-MkrAx-51uwuvDxM_Z3r%2Fuploads%2FdNRtsFmfmyKlCfDgybAO%2Fimage.png?alt=media&amp;token=805e3644-3921-4057-a75f-1492efe4fd0c" alt="" width="563"><figcaption></figcaption></figure>

The void item is shown below:

<figure><img src="https://2174323930-files.gitbook.io/~/files/v0/b/gitbook-x-prod.appspot.com/o/spaces%2F-MkrAx-51uwuvDxM_Z3r%2Fuploads%2FdRIxFw7TAnkKmxDmseQk%2Fimage.png?alt=media&amp;token=dd51fd1e-b7ef-44ac-9a51-e4cef7175b17" alt="" width="563"><figcaption></figcaption></figure>

### Running Order

You can add items to the running order by tapping on **“Running”** from the order detail dialog box.

&#x20;

<figure><img src="https://2174323930-files.gitbook.io/~/files/v0/b/gitbook-x-prod.appspot.com/o/spaces%2F-MkrAx-51uwuvDxM_Z3r%2Fuploads%2FX1rtQiqt7NWfGUpwd2Og%2Fimage.png?alt=media&amp;token=6b5c3a7c-d8ac-4646-a2c6-9474d9ae8b34" alt="" width="563"><figcaption></figcaption></figure>

Your already ordered items are shown under the ordered item section and running order items are shown under running items.

<figure><img src="https://2174323930-files.gitbook.io/~/files/v0/b/gitbook-x-prod.appspot.com/o/spaces%2F-MkrAx-51uwuvDxM_Z3r%2Fuploads%2FYJanWQU6mfL0STYOn9NZ%2Fimage.png?alt=media&amp;token=a97021ff-10f3-4041-82f1-d76b3881426d" alt="" width="563"><figcaption></figcaption></figure>

### Serve Order

You can tap on the **Serve Order.**

<figure><img src="https://2174323930-files.gitbook.io/~/files/v0/b/gitbook-x-prod.appspot.com/o/spaces%2F-MkrAx-51uwuvDxM_Z3r%2Fuploads%2FwjPUPlMhBIV7GI9uJxN5%2Fimage.png?alt=media&amp;token=5b8151e6-cf9a-4f8b-a9d6-45949378c97b" alt="" width="563"><figcaption></figcaption></figure>

### Pay Order

Tap on **“Pay”** to add payment details.

<figure><img src="https://2174323930-files.gitbook.io/~/files/v0/b/gitbook-x-prod.appspot.com/o/spaces%2F-MkrAx-51uwuvDxM_Z3r%2Fuploads%2FX7IN27i5jO9tjvqs5fxI%2Fimage.png?alt=media&amp;token=97a084b7-0c2c-4035-a54f-ba51b419de69" alt="" width="563"><figcaption></figcaption></figure>

### Print Receipt

You can print a receipt by tapping **“Print Receipt”.**

<figure><img src="https://2174323930-files.gitbook.io/~/files/v0/b/gitbook-x-prod.appspot.com/o/spaces%2F-MkrAx-51uwuvDxM_Z3r%2Fuploads%2FfLfR2AoBda7zMVUSyriq%2Fimage.png?alt=media&amp;token=cb4b4781-8664-45e6-a7de-e5522a03658a" alt="" width="563"><figcaption></figcaption></figure>

### Complete Order

Mark the order as complete by tapping on **“Complete Order”.**

<figure><img src="https://2174323930-files.gitbook.io/~/files/v0/b/gitbook-x-prod.appspot.com/o/spaces%2F-MkrAx-51uwuvDxM_Z3r%2Fuploads%2F8HMOzU9QE8QTJudbgrhW%2Fimage.png?alt=media&amp;token=7930ea5c-1cd1-4549-881c-8d9fe9ad60d9" alt="" width="563"><figcaption></figcaption></figure>

## Order Flows

We have designed various order flows for the accuracy and efficiency of your restaurant operations.

### Dine-in Order Flow

You can place dine-in orders by following 2 workflows:

1. When you make the payment at placing the order.
2. When you make the payment after serving the food.

<figure><img src="https://2174323930-files.gitbook.io/~/files/v0/b/gitbook-x-prod.appspot.com/o/spaces%2F-MkrAx-51uwuvDxM_Z3r%2Fuploads%2F6CiAXUO5zyYbgIFSZXdA%2Fimage.png?alt=media&amp;token=59a54317-b613-428a-ab27-f11b3a4f710e" alt=""><figcaption></figcaption></figure>

#### Payment after Serving the Order

If payment is made after serving the food, then the following flow will be followed:

1. Punch the order.
2. Order is sent to the kitchen through KOT or it could be efficiently managed through Kitchen Display Screen.
3. Order is served to the customer.
4. The customer makes the payment.
5. Order is completed.

#### Payment at the Time of Placing the Order

If you want to take the payment at the time of placing the order, then the following flow will be followed:

<figure><img src="https://2174323930-files.gitbook.io/~/files/v0/b/gitbook-x-prod.appspot.com/o/spaces%2F-MkrAx-51uwuvDxM_Z3r%2Fuploads%2FbU7ol4xQqmveDaWNtnf9%2Fimage.png?alt=media&amp;token=03f5ccc2-0fbb-458f-9b19-70a813f39c21" alt=""><figcaption></figcaption></figure>

1. Punch the order.
2. Collect the payment.
3. Placed order is sent to the kitchen through KOT’s or it could be efficiently managed through Kitchen Display Screen.
4. Order is served to the customer.
5. Order is completed.

### Delivery Order Flow

For delivery orders, the workflow will be as follows:

<figure><img src="https://2174323930-files.gitbook.io/~/files/v0/b/gitbook-x-prod.appspot.com/o/spaces%2F-MkrAx-51uwuvDxM_Z3r%2Fuploads%2FlVabZ1DagoodZIOitrfA%2Fimage.png?alt=media&amp;token=bbd97973-0bb4-479e-b31b-24efe80a3cac" alt=""><figcaption></figcaption></figure>

1. Punch the order.
2. Placed order is sent to the kitchen through KOT’s or it could be efficiently managed through Kitchen Display Screen.
3. Once the order is ready, the rider picks up the order and updates the status as “Mark on the way”.
4. Rider delivers the order and receives payment.
5. The order is completed.

### Takeaway Order Flow

For takeaway orders, the workflow will be as follows:

<figure><img src="https://2174323930-files.gitbook.io/~/files/v0/b/gitbook-x-prod.appspot.com/o/spaces%2F-MkrAx-51uwuvDxM_Z3r%2Fuploads%2FMkO3e5FaEqEgkdg9ngxy%2Fimage.png?alt=media&amp;token=d487ef5b-d09f-4294-8808-e8480b59797a" alt=""><figcaption></figcaption></figure>

1. Punch the order.
2. Collect the payment.
3. Placed order is sent to the kitchen through KOT’s or it could be efficiently managed through Kitchen Display Screen.
4. Order is served/served to the customer.
5. The order is completed.


# Split Payments

## Split Payment Options for FoodBucket

At FoodBucket, we understand the importance of providing a seamless and hassle-free payment experience for our customers. To enhance the customer experience, we offer split payment options for our users. Customers can split their payments into multiple methods for a single order, making it easier to pay for their meals. We offer two types of split payment options:

* Divide Equally by the Number of People
* Select Manually Items for Each Receipt

### Divide Equally by the Number of People

With this option, customers can divide the total amount of their order equally among the number of people sharing the meal. This is a great option for groups who want to split the cost of their meal evenly.

<figure><img src="https://2174323930-files.gitbook.io/~/files/v0/b/gitbook-x-prod.appspot.com/o/spaces%2F-MkrAx-51uwuvDxM_Z3r%2Fuploads%2Fz1j4GtBoZs8OwuxMeCn2%2Fimage.png?alt=media&amp;token=6af5075c-a6dd-4b69-8776-9c1b9f0affec" alt="" width="563"><figcaption></figcaption></figure>

To use this option, customers can select the "Divide Equally on Number of People" option at checkout. They will then be prompted to enter the number of people sharing the meal. The total amount of the order will be divided by the number of people, and each person's share will be displayed. Customers can then select their preferred payment method to pay their share of the total.

<figure><img src="https://2174323930-files.gitbook.io/~/files/v0/b/gitbook-x-prod.appspot.com/o/spaces%2F-MkrAx-51uwuvDxM_Z3r%2Fuploads%2FmWsQA8iqWwNi6Gitjjm8%2Fimage.png?alt=media&amp;token=64fe033b-b1e2-4b87-bd58-b3a74f3e6ad9" alt="" width="563"><figcaption></figcaption></figure>

### Select Manually Items for Each Receipt

This option allows customers to select which items on the order will be paid for by each individual in the group. Customers can manually assign items to each person's receipt, allowing for more flexibility in splitting the cost of their meals.

<figure><img src="https://2174323930-files.gitbook.io/~/files/v0/b/gitbook-x-prod.appspot.com/o/spaces%2F-MkrAx-51uwuvDxM_Z3r%2Fuploads%2FIVdLJ3s2NF4dTP2cqK0k%2Fimage.png?alt=media&amp;token=4501ad1c-4b5f-49e8-b178-b2a0756199ff" alt="" width="563"><figcaption></figcaption></figure>

To use this option, customers can select the "Select Manually Items for Each Receipt" option at checkout. They will then be prompted to assign each item on the order to a specific receipt. Once all items have been assigned, customers can select their preferred payment method to pay for their assigned items.

<figure><img src="https://2174323930-files.gitbook.io/~/files/v0/b/gitbook-x-prod.appspot.com/o/spaces%2F-MkrAx-51uwuvDxM_Z3r%2Fuploads%2F6VJx1oSTlyAiN52nxAAc%2Fimage.png?alt=media&amp;token=c4bf2d6a-b978-4c05-8c63-0df66bc6029e" alt="" width="563"><figcaption></figcaption></figure>

### Conclusion

At FoodBucket, we believe in providing a convenient and customizable payment experience for our customers. Our split payment options allow for easy sharing of the cost of meals among groups of people. Whether customers choose to divide their payments equally or manually assign items to each receipt, our split payment options offer a seamless and hassle-free payment experience.


# Table Management

### Overview

You can fill more seats and keep service flowing smoothly with FoodBucket Table Management System. You can manage all the table arrangements from the backend/admin area. However, you can manage the following with POS:

* Open Table
* Occupied Table
* Private Table
* Merge Table

#### Open Table

The table is open and available which means that it is clean and prepared for the next customer.

#### Occupied Table

A table is said to be occupied when it is occupied by customers. It shows by a bar on POS as shown in the image below:

<figure><img src="https://2174323930-files.gitbook.io/~/files/v0/b/gitbook-x-prod.appspot.com/o/spaces%2F-MkrAx-51uwuvDxM_Z3r%2Fuploads%2FD1jWBL0vDE3phToOvTKg%2Fimage.png?alt=media&amp;token=3b3c917a-fcff-4c46-8928-ef3983d336c8" alt="" width="563"><figcaption></figcaption></figure>

#### Private Table

Private sales are carried on private tables where the bill is not charged. You can change the status of a table to a private table from the **backend/admin area.**

#### Merge Table

To merge tables together, choose the “Merge Tables” option.

<figure><img src="https://2174323930-files.gitbook.io/~/files/v0/b/gitbook-x-prod.appspot.com/o/spaces%2F-MkrAx-51uwuvDxM_Z3r%2Fuploads%2FV6t4nsoUyM6DuxZ2v8SZ%2Fimage.png?alt=media&amp;token=181fe5c7-0161-42fc-b3f5-328ca910fc35" alt="" width="563"><figcaption></figcaption></figure>

&#x20;Select the table that you want to merge from the dialog box.

<figure><img src="https://2174323930-files.gitbook.io/~/files/v0/b/gitbook-x-prod.appspot.com/o/spaces%2F-MkrAx-51uwuvDxM_Z3r%2Fuploads%2FFupbs1m4b146w92rzi3k%2Fimage.png?alt=media&amp;token=6ed2849b-fe08-42a5-9230-d4e01f5906ac" alt="" width="563"><figcaption></figcaption></figure>

Order items of the merged tables will be shown in the merged table.


# Day Opening & Closing

## Opening Day

&#x20;You can open your day from the POS as well as from the Admin Panel.

### POS

* Login to your POS.
* Punch your first order and your new day is opened.

### Admin Panel

* Login to your **Admin Panel.**
* Go to **Inventory > Dashboard.**
* Here you will see the button to open the day if your day is closed.

#### Closing Day

&#x20;You can easily close your day from your POS.

* Login to your **POS**.
* Click on the Top Right **“Button”.**

  <figure><img src="https://2174323930-files.gitbook.io/~/files/v0/b/gitbook-x-prod.appspot.com/o/spaces%2F-MkrAx-51uwuvDxM_Z3r%2Fuploads%2F8i54zWAOAvXkEEDgfGT8%2Fimage.png?alt=media&amp;token=e726d615-56a5-47ae-8a39-125c16fdf792" alt="" width="563"><figcaption></figcaption></figure>
* After clicking on it, you will be asked for your Admin **username & password.**
* After the day is, closed you will have your whole **sales summary.**
* Your **Sales Summary** will be printed from your thermal printer if any thermal printer is connected to your POS and it will also be shown on your POS screen.

After closing and printing all of your required things, scroll down to the very bottom of the page and you will see a button saying **“Dismiss”**. Click on that and you will be redirected to the login page.

#### Now you have successfully closed your day.

After clicking on dismiss, you won’t be able to see or print your sales summary. If you want to see your sales, log in to your Admin Panel. Go to Reports > Sales Statistics. Here you can see your whole report history.


# Reports from POS

FoodBucket provides four types of reports that can be generated from the Point of Sale (POS) system. These reports include Sale Summary, Monthly Report, Custom Report, and Quantity Report.

<figure><img src="https://2174323930-files.gitbook.io/~/files/v0/b/gitbook-x-prod.appspot.com/o/spaces%2F-MkrAx-51uwuvDxM_Z3r%2Fuploads%2Ffgw9zqNcqFDPU8r3nx72%2Fimage.png?alt=media&amp;token=887855dc-c391-43f9-8842-afa14a3e4018" alt="" width="563"><figcaption></figcaption></figure>

### Sale Summary Report

The Sale Summary report provides a summary of all sales made during a specified period of time. This report includes information such as the total sales amount, the number of orders taken, and the number of customers served. The Sale Summary report is useful for getting an overview of how the restaurant is performing over a particular period of time.

### Monthly Report

The Monthly Report provides a detailed breakdown of sales for each month. This report shows the total sales for each month, as well as the number of orders and customers served. The Monthly Report is useful for tracking performance over time and identifying trends.

### Custom Report

The Custom Report allows users to create a report with specific criteria. This report can be customized to include information such as sales by menu item, sales by employee, or sales by location. The Custom Report is useful for generating reports that meet specific business needs.

### Quantity Report

The Quantity Report provides information on the quantity of each menu item sold during a specified period of time. This report shows the number of times each menu item was ordered, as well as the total revenue generated by each item. The Quantity Report is useful for understanding which menu items are the most popular and which items may need to be promoted.

To generate any of these reports for FoodBucket, simply log in to the POS system and navigate to the Reports section. From there, select the type of report you wish to generate and specify the date range and any other necessary criteria. Once you have generated the report, it can be exported to a CSV or Excel file for further analysis.

Please note that these reports are only available for the FoodBucket product and may differ from reports available for other products.


# Changing Server


# Connecting to Customer Facing Display

## Introduction:

The FoodBucket Customer Facing Display is a digital display system that is designed to enhance the overall customer experience at restaurants and other food service establishments. It is a modern solution that allows customers to view and interact with digital menus, place orders, and even make payments using the display system. This document aims to provide an overview of the FoodBucket Customer Facing Display, its features, and how it can benefit your business.

<figure><img src="https://2174323930-files.gitbook.io/~/files/v0/b/gitbook-x-prod.appspot.com/o/spaces%2F-MkrAx-51uwuvDxM_Z3r%2Fuploads%2FUcil6nKpEkPAYMNrlq2p%2Fimage.png?alt=media&amp;token=a9b02808-13f6-4490-bfab-2fda62c5328e" alt=""><figcaption></figcaption></figure>

### Features:

The FoodBucket Customer Facing Display is packed with a range of features that are designed to enhance the customer experience. Some of its key features include:

<figure><img src="https://2174323930-files.gitbook.io/~/files/v0/b/gitbook-x-prod.appspot.com/o/spaces%2F-MkrAx-51uwuvDxM_Z3r%2Fuploads%2F0S0i6ebI2yvSehGFbeK6%2Fimage.png?alt=media&amp;token=f96567d2-05b8-4f13-b364-ffa708e7bfe2" alt=""><figcaption></figcaption></figure>

* **Digital Menu Display:** The system allows for a digital menu display that is visually appealing and easy to navigate. Customers can view pictures and detailed descriptions of dishes, along with pricing information and nutritional information, making it easier for them to make informed decisions about what to order.
* **Order Placement:** The display system allows customers to place their orders directly from the screen, eliminating the need for a traditional paper-based menu or ordering system. This not only reduces the wait time for customers but also increases efficiency and accuracy for the restaurant.
* **Payment Processing:** The system allows for secure payment processing, allowing customers to pay for their orders using a range of payment options, including credit and debit cards, mobile payments, and contactless payments. This not only makes the payment process faster and more convenient but also reduces the need for staff to handle cash.
* **Customization:** The display system can be customized to suit the needs of your business. You can customize the menu layout, add your branding and logo, and even display promotional offers and deals.

### Benefits:

The FoodBucket Customer Facing Display offers a range of benefits to both customers and businesses. Some of its key benefits include:

* **Increased Efficiency:** The system reduces the wait time for customers, allowing them to place their orders quickly and easily. This not only improves the customer experience but also increases efficiency for the restaurant.
* **Improved Accuracy:** The digital menu display and order placement system reduce the risk of errors in orders, resulting in fewer returns and unhappy customers.
* **Increased Sales**: The system allows for the display of promotional offers and deals, which can increase sales and revenue for the restaurant.
* **Better Customer Experience**: The system provides a modern and interactive customer experience, improving overall customer satisfaction and loyalty.

### Conclusion:

The FoodBucket Customer Facing Display is a modern and innovative solution that can enhance the customer experience and improve the efficiency of your restaurant. It offers a range of features and benefits that can increase sales and revenue, improve accuracy, and provide a better overall customer experience. If you're looking for a way to take your restaurant to the next level, the FoodBucket Customer Facing Display is definitely worth considering.


# Troubleshooting POS